Overview
ChucK is a strongly-typed, strongly-timed, concurrent audio
and multimedia programming language. It is compiled into virtual
instructions, which are immediately run in the ChucK Virtual Machine.
This guide documents how to use the language in the Unity game engine environment.
Tutorials
These tutorials start from a working Roll a Ball game (➠Official Unity Tutorial).
You are encouraged to follow that tutorial first if you are unfamiliar with working in Unity.
If you'd rather not go through the Roll a Ball tutorial, you can download the resulting project.
If you know your way around Unity, you'll probably do fine following the below tutorials
to add ChucK to any existing Unity project.
These tutorials were created with Unity version 5.6.0f3. Please note that these tutorials in particular are not maintained, as the main
method of using ChucK in Unity is documented here.
Setup
First, you'll need to add the necessary files into the project.
Add this package to your project via the Assets > Import Package menu.
-
Next, we'll set up the Audio Mixer that will hold our ChucK plugins.
First, create a new Audio Mixer in the Project pane.
Give it a name. Mine is called MyAudioMixer.
Next, we'll need to connect at least one Audio Source
to this mixer so that Unity will enable audio from the mixer.
Create a new Audio Source component on any Unity object.
I'll put mine on the Player object.
Connect the Audio Mixer's Master Group
to the Audio Source's Output Group slot.
(In Unity, "Group" is the name for a channel strip of an audio mixer.)
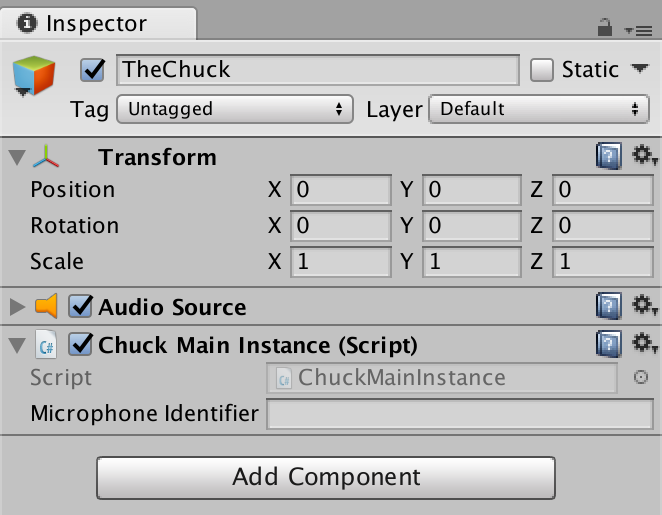
When you've done that, the Audio Source will look like this. It doesn't need
to have an audio file attached to the AudioClip field
for the connection to work properly.
Finally, restart Unity so that the AudioPluginChucK file will be loaded properly.
Now, you've finished adding ChucK and an Audio Mixer to your project!
-
Now, let's add our first instance of the ChucK plugin to the Audio Mixer.
Open the Audio Mixer by double-clicking on it from the Project pane.
Drag the new pane that opens as a result to somewhere that's convenient.
It should look like this when it is open.

Let's create a new Group (channel strip)
to hold our ChucK plugin. Create the new group by using the + button next to
the Groups category. Since it's possible to have multiple ChucK
plugins in one project, and each will probably have its own Group,
I named my new Group Chuck 1.

When you've created the new Group, it should look like the leftmost picture.
Hit the Add button to bring up a menu of all the
plugins you could add to this Group.
Select ChucK from the list. (It appears in this list because you added the AudioPluginChucK plugin to your project!)
Then, move the new ChucK plugin above the Attenuation plugin by dragging it up.
This way, the volume slider on this Group will affect the volume of your
ChucK scripts.
  
When you've finished, your new channel strip will look like this.

-
Next, let's work on creating the reference to this ChucK plugin that we'll
use to send ChucK code to the specific we just added to our Audio Mixer.
With your Group selected, look at the Inspector pane.
Right click on the ChucK ID field name of the
new ChucK plugin.

From the menu that appears, choose the Expose ... to script
option.

Now, look back at the Audio Mixer pane.
Select the Exposed Parameters dropdown menu in the upper-right-hand corner.

You should see an exposed parameter with the name MyExposedParam.
This is the parameter you just exposed by right-clicking on ChucK ID a moment ago.

Double-click this exposed parameter's name to give it a new name.
You will use this name later to send ChucK code to the plugin you just added.

Press the Enter key to confirm the new name.

Now, you've finished creating your first ChucK plugin!
-
Next, let's access this ChucK plugin through a Unity C# script.
Since I am adding ChucK to my Roll a Ball project (➠Official Unity Tutorial),
I'll add ChucK to my PlayerController script.

First, add the UnityEngine.Audio import to the script.

To access any ChucK plugin, you will need two things:
- A reference to the Audio Mixer where the ChucK plugin exists.
- A copy of the string name of the plugin (chosen in the Expose Parameter step).
Add a public variable to hold an AudioMixer and a private variable
to hold the string name of your plugin.

Initialize the string name inside of your class's Start() function
by storing a string with the exact name you used in the
Expose Parameter step.

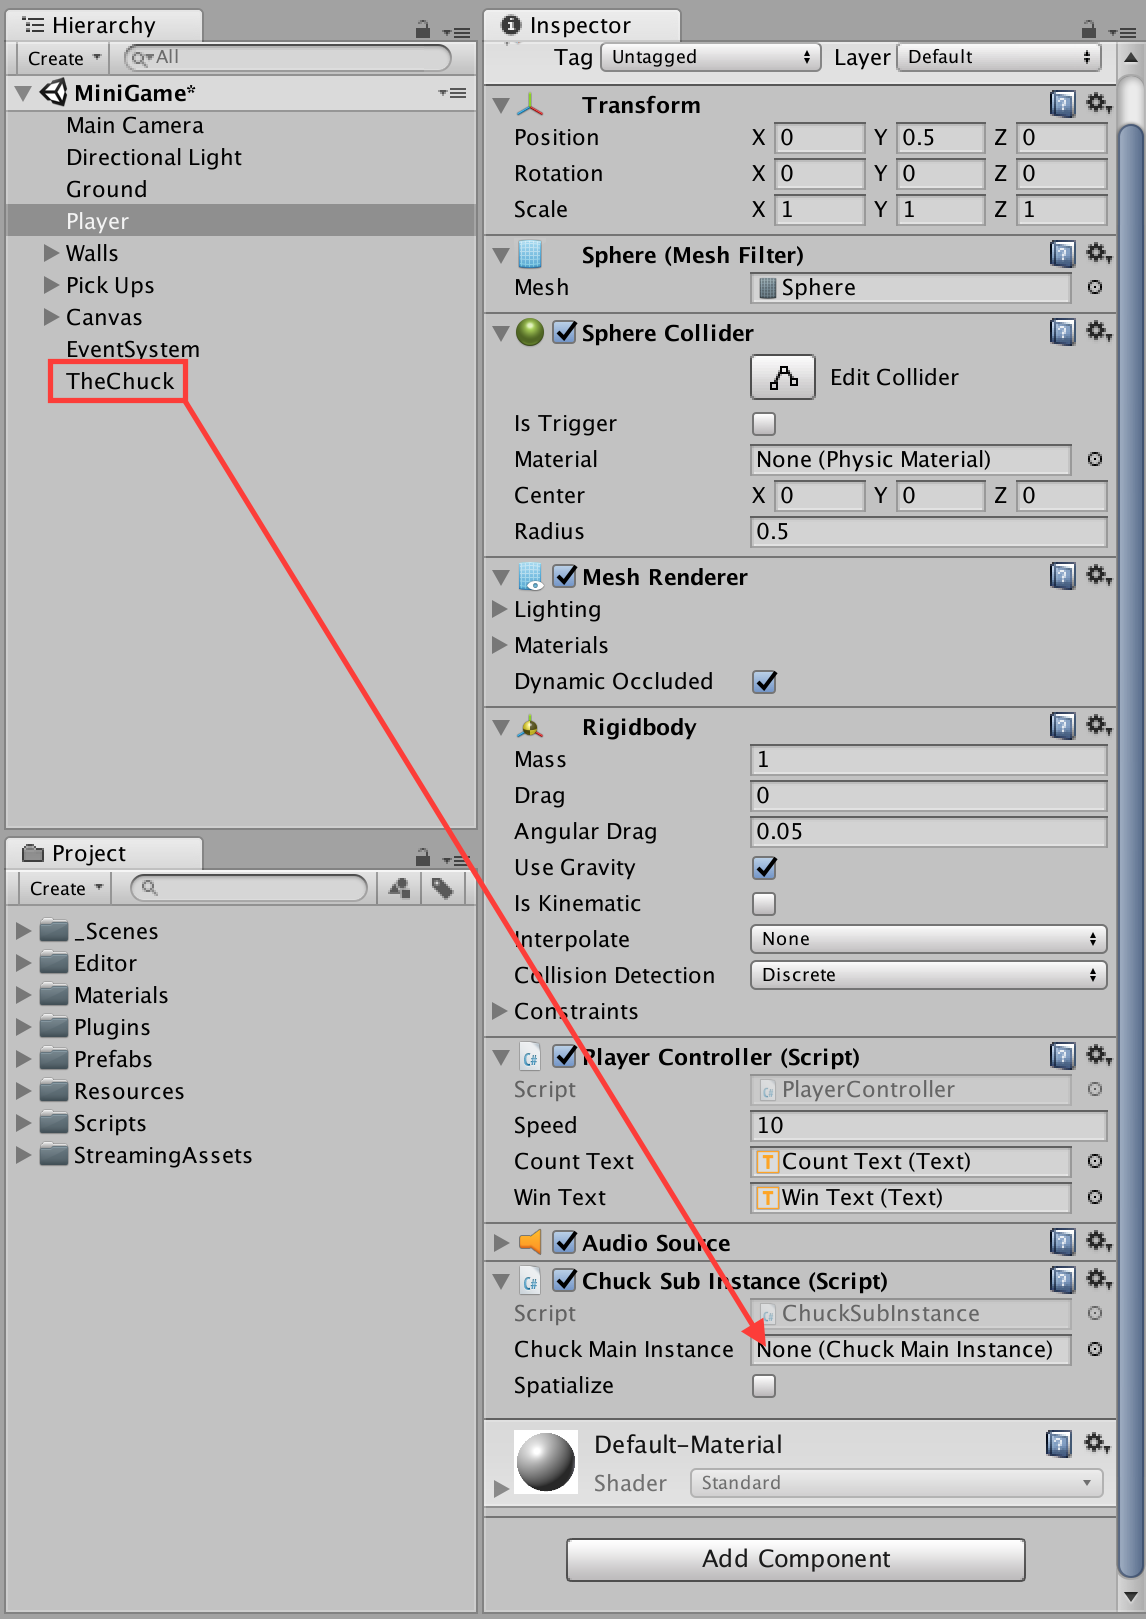
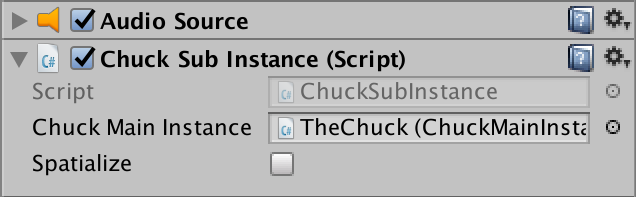
The AudioMixer variable is a public variable, so it is initialized by dragging
something into a slot on the Script component in the Inspector pane.
Open the Player object in the Inspector pane (since this is where the Player Controller script is).
Then, drag your AudioMixer from the Project pane into the new public variable slot on your
Player Controller script.

When you've done that, the Player Controller script component will look like this.

Now that both your string name and your AudioMixer variables have been initialized, it's time to
Initialize the ChucK plugin. This should be done once per plugin,
anywhere in a Start() function that will be called when your scene
becomes active.
Call Chuck.Manager.Initialize with the AudioMixer and string name arguments.
(You can access Chuck.Manager because you added Chuck.cs
to your scripts folder!)

Great! Now you've fully set up your ChucK plugin for use in this script and you can write ChucK code
in this script that gets sent to the ChucK plugin!
-
Now, let's write our first ChucK script in Unity!
Here's a new ChucK script. It's sent to the ChucK plugin using
Chuck.Manager.RunCode, where the first argument
is the string name of the ChucK plugin and the second argument is a string
with ChucK code that will be compiled and run on the fly.
This particular ChucK script connects a sine wave to the output,
then sets its frequency randomly between 300 Hz and 1000 Hz every 100 ms, forever.
(Note: @"" denotes a multi-line string.)

Let's test it! Enter play mode.

And you can hear audio! (Check the Audio Mixer pane to see volume levels for each Group while the game is in play mode.)

There's just one problem — the audio doesn't stop playing when we exit play mode! Whoops!

All ChucK plugins are reset whenever you enter play mode, but it can be kind of annoying to have
them keep playing when you exit play mode.
In order to reset all ChucK plugins additionally when you exit play mode, you will just need
to add a call to Chuck.Manager.Quit() inside any MonoBehaviour's
OnApplicationQuit() function. I added this function to my PlayerController
script.

Now let's test it again by entering play mode...

And when we exit play mode, the audio shuts off!

Congratulations! You now have ChucK working inside of a Unity project!!
Responding to Unity Events / Using Unity Variables (1)
In the previous tutorial, we set up ChucK in a Unity project and
wrote a script that plays a sine wave with a randomly-changing frequency
forever. Let's change that script into something a bit more appropriate
for our Roll a Ball game.
First, delete the original call to ChucK.Manager.RunCode()
so that our original ChucK script doesn't play anymore.
Now, I want to write a script that plays every time our Player object
picks up a Pick Up object. This will go in the OnTriggerEnter
function, where we detect collisions with trigger objects.

Here, I've added a new ChucK script in that function. It runs directly after
we increment the count of how many pickup objects have been picked up so far.
It's very similar to the first script, but only plays 5 different frequencies
instead of running forever. ( repeat( 5 ) instead
of while( true ) ).

This is a good start, but it's not very interesting. How about we make it repeat
a number of times according to the current count?
To do this, we can use the string.Format() function.
This function takes a string with format substrings that look like {0},
{1:0.00}, {2}, etc.
and takes arguments to fill all the numbered slots.
Because arguments to string.Format() are
specified with { and },
we have to write {{ if we mean {
and }} if we mean }.
So, to translate the above script into one that repeats count
times instead of 5 times, I replace the
5 with a {0},
replace all { and } with
{{ and }}, then wrap the
code string in a call to string.Format() and include
count as the second argument.

It's that simple to write and launch ChucK code that responds to a Unity event
and uses values from current Unity variables!
Spatialization
Spatialization is the technique of processing a stream of audio so that it
is perceived to be originating from a particular place in the environment.
Here, I will demonstrate how to achieve a simple form of spatialization in
Unity to spatialize sounds generated from a ChucK plugin.
This technique will set the overall volume according to the distance from
the audio listener to the source of audio, and will set the relative volume
of the left and right channels according to the direction between the audio
listener and the source of audio, but will not use HRTFs or change the spectral
content of the source of audio in any way.
(The reason for this limitation is due to the way that Unity only allows
spatialization plugins to be placed directly on Audio Sources, which can
only be used to play back existing .wav files. It would be possible to implement
ChucK as a spatialization plugin, but this would entail implementing our own
spatialization algorithm and UI for it. Since Unity's existing spatialization UI is
quite extensive, we will only implement this alternative method if there is a
high demand for it.)
-
First, we will set up a new ChucK plugin to receive the spatialization
data and output spatialized audio.
Open the Audio Mixer pane and add a new Child Group to the Master Group by
clicking the plus button or right clicking on the Master Group. This way,
both our original ChucK plugin and our new spatialized ChucK plugin will
both be summed together at the Master Group, but will otherwise not interfere
with or feed into each other.
I'm calling my new Group Spatial ChucK. Click the Add button to add a
ChucK plugin onto this new Group.
Select ChucK from the dropdown menu and drag the new ChucK plugin above the
Attenuation plugin so that the volume fader on the ChucK Spatial Group will
be applied to the new ChucK plugin.
When you're done, the new Group should look like this. Make sure it's selected.

With the new Group selected, look at the Inspector pane. Right click on the
ChucK ID property of your newly-created ChucK plugin.
From the dropdown, choose the Expose... to script option.
Now, return to the Audio Mixer pane. Open the Exposed Parameters dropdown tab
and find the parameter you just exposed, called MyExposedParam.

Rename this exposed parameter by double clicking it, typing a new name, and pressing enter.
This name will be the one you use to send ChucK code to this ChucK plugin.
I called mine spatial_chuck.
Now, this new ChucK plugin is set up to receive ChucK code from any Unity script!
-
Next, let's set up a Unity object to send spatial data to our new ChucK plugin.
Let's talk a bit about how we will assemble the signal flow of information
on top of Unity's existing infrastructure for spatialized audio.
Unity only allows audio files to be spatialized. Once an audio file has been
spatialized, it can be sent to a Group on an Audio Mixer (which is where our
ChucK plugins live).
To take advantage of this, we will "play" a special audio file such that
when the audio file is spatialized and sent to ChucK, we can tell what the
spatialization parameters were and apply them to a new source of audio.
To do this, we will play an audio file that only has "DC offset". In this audio
file, every single audio sample has the value 1.0.
The amplitudes of the left and right channels of this audio file will be adjusted
by Unity according to how the audio source is positioned in the world.
Then, because the original audio file only held the value 1.0,
if we multiply the spatialized result by any other audio signal, it will have
the effect of lowering the amplitude of the left and right channels of that
audio signal to the correct, spatialized levels.
So, to recap: we will add an Audio Source to an object in Unity. We will set that
object's audio file to one with all values set to 1.0.
We will route the spatialized audio to our new Spatial ChucK Group. Then,
we will use the spatialized audio to set the levels correctly for a new
audio signal that we generate in the spatial_chuck plugin.
I'd like for one of my Pick Up objects to create spatialized sound, so I'll select
one of these objects from the Hierarchy pane.
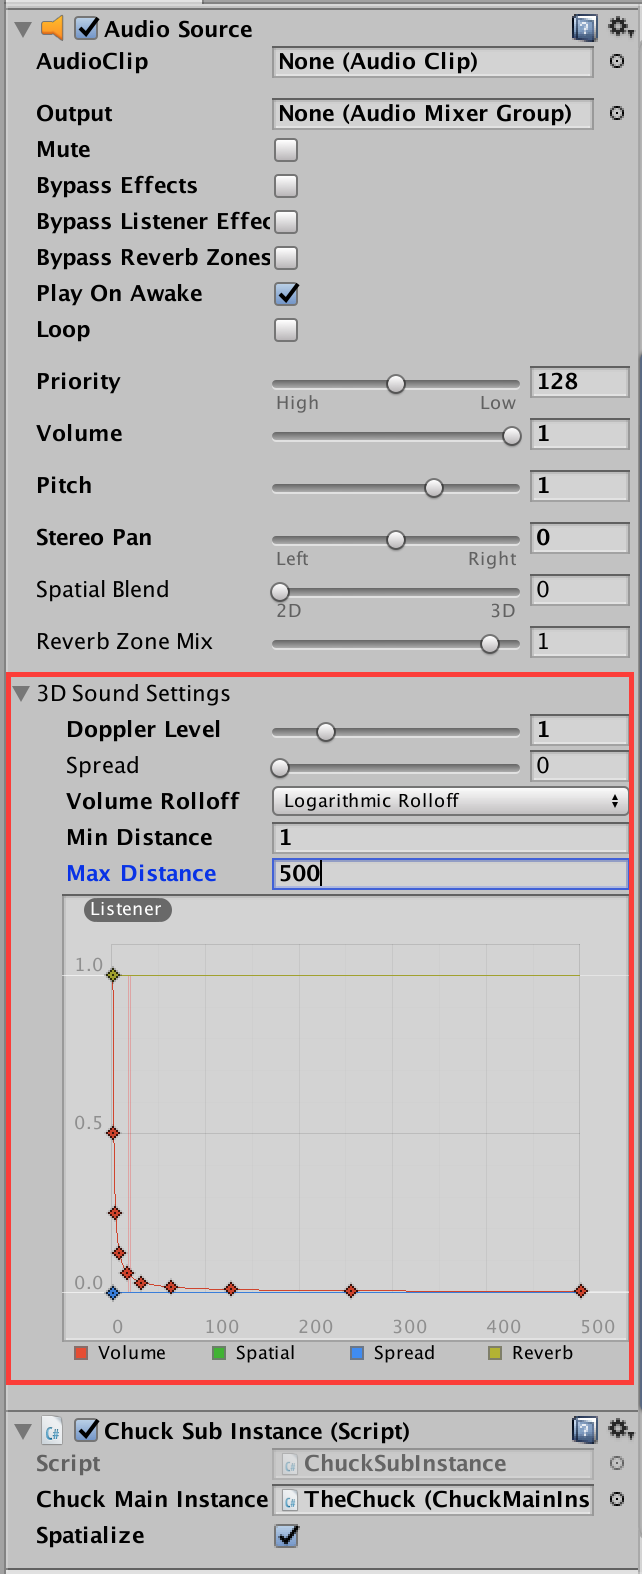
To hold the special audio file, add an Audio Source component to this Pick Up object.
Next, add a suitable pre-spatialization audio file (like 1.wav)
to a new folder in your Project pane called Audio.

Set this file to be the AudioClip for your new Audio Source component. Then, set
the Audio Source's Output to be the new Group we created to hold our spatial_chuck plugin.
Check the boxes for "Play on Awake" and "Loop". This will ensure that the
DC offset signal is always coming out of the Audio Source while your game
scene is active.
Next, set "Spatial Blend" all the way to "3D". This way, Unity will apply
its spatializer to the fullest.
Finally, set the "Max Distance" parameter to something that makes sense
for the scale of your project. For my project, I changed this value from
500 to 40. You could
also play around with some of the other settings.
-
(Optional) You could consider switching the Audio Listener from being set to
your Camera to being set to your Player object. This will mean that spatial
sounds will be "heard" from the perspective of the Player, rather than from
the perspective of the Camera. This might or might not make sense to do,
depending on your particular game.
Each scene can only have one Audio Listener active at a time. First, uncheck
the Audio Listener from the Main Camera object.

Next, add a new Audio Listener component to the Player object.

Now your scene is set up to send and receive spatial audio!
-
Now that we have an Audio Source sending spatial audio data to our new ChucK
plugin, let's write a script that uses the spatial audio data to generate
spatialized audio!
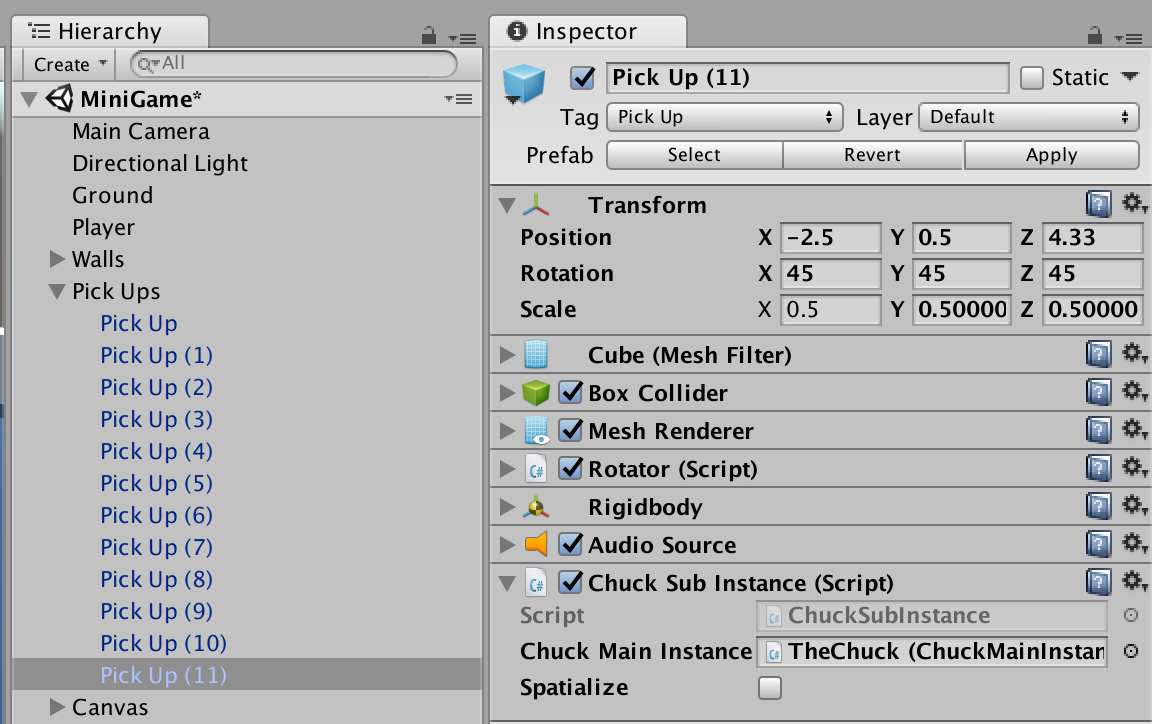
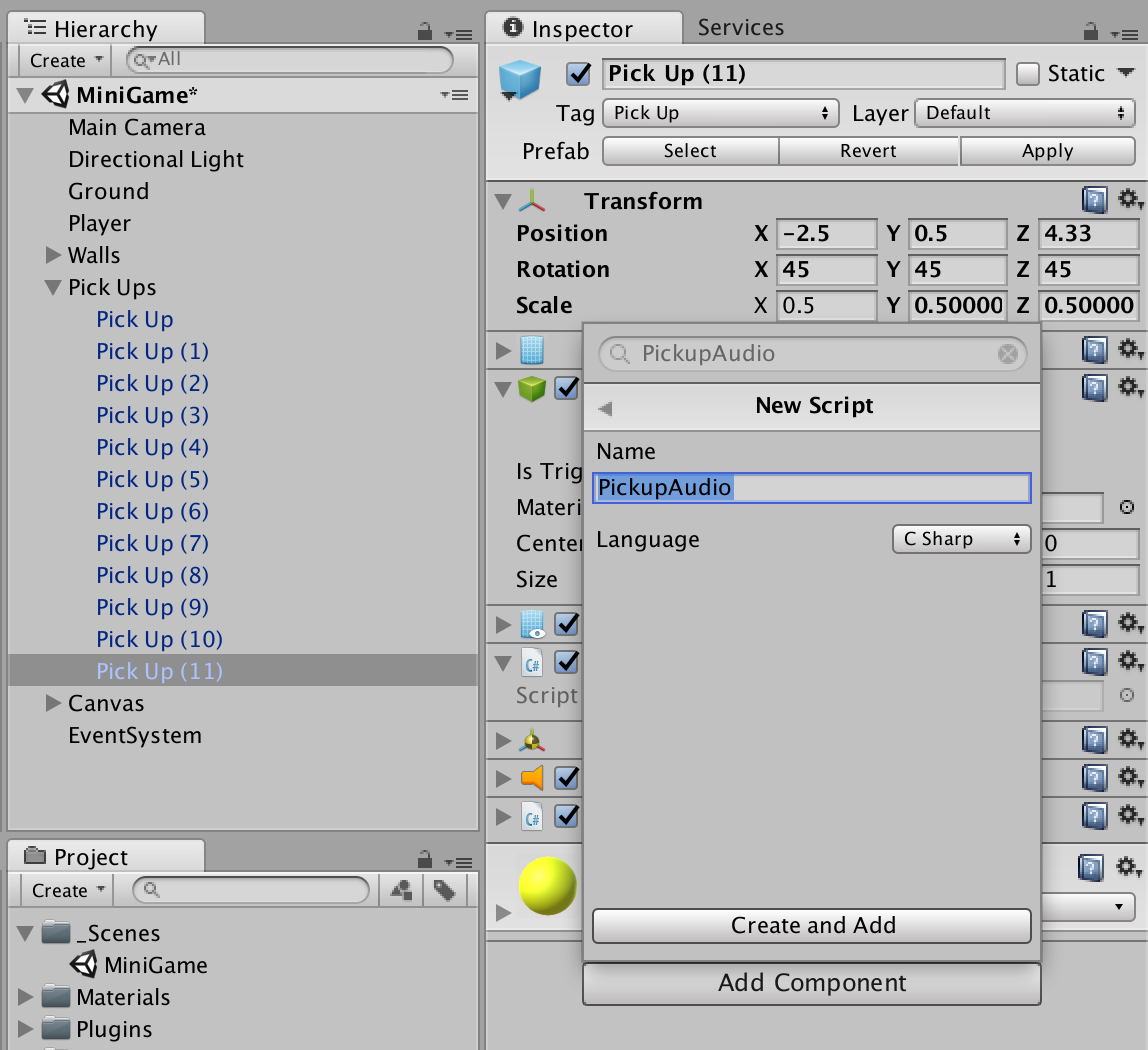
First, create a new script using the Add Component button on the object you
want to spatialize. I'll call my script Spatializer.
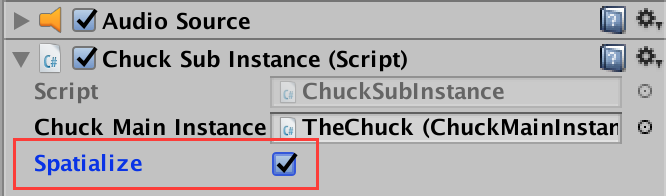
In the script, initialize the new ChucK plugin. Do this by adding the import
statement for UnityEngine.Audio, the public variable
to store the AudioMixer, and the private
to store the ChucK plugin's string name (chosen by you in the Expose Parameter step).
Initialize the string name with the name of the ChucK plugin, and initialize the
ChucK plugin with a call to Chuck.Manager.Initialize().
Don't forget to initialize the public AudioMixer variable!
Do this by dragging your project's Audio Mixer into the new slot created on your
script component.

After you complete those steps, the component will look like this, and the
ChucK plugin should be initialized and ready to use in a script.

Now, let's write some ChucK code that uses the spatial audio data!

This is a bit complex, so let's go over the spatialization setup in more detail.
adc and dac are the keywords
in ChucK that mean the input and output, respectively. adc.chan(0)
and adc.chan(1) are the left and right channels of the input.
These channels hold the spatialization data. This data is just a series of numbers representing
the correct output amplitude for each channel, because we sent an audio file that was just
a series of ones to the Unity spatializer.
adc.chan(0) => Gain leftChannel => dac.chan(0)
adc.chan(1) => Gain rightChannel => dac.chan(1)
After these two lines, the audio signal flow looks like this:

Next, we create our sound source and hook it up into the Gain nodes we created.
TriOsc oscToSpatialize;
oscToSpatialize => leftChannel;
oscToSpatialize => rightChannel;

This is almost what we want. But, the spatialization data is getting added to
our sound. What we want instead is to set the amplitude of our sound by the spatialization
data. We can achieve this by multiplying our sound by the spatialization data instead.
3 => leftChannel.op;
3 => rightChannel.op;

Now, we have a single triangle wave oscillator connected to both the left
and right channels of the output, with each channel's amplitude multiplied by
the incoming spatial data!
Note that you can extend this to process an arbitrary number of audio generators
into the same spatial setup by replacing the TriOsc
node with a Gain node, and chucking all your sound
generators to that Gain node.
Let's test our new script to see if it's working!
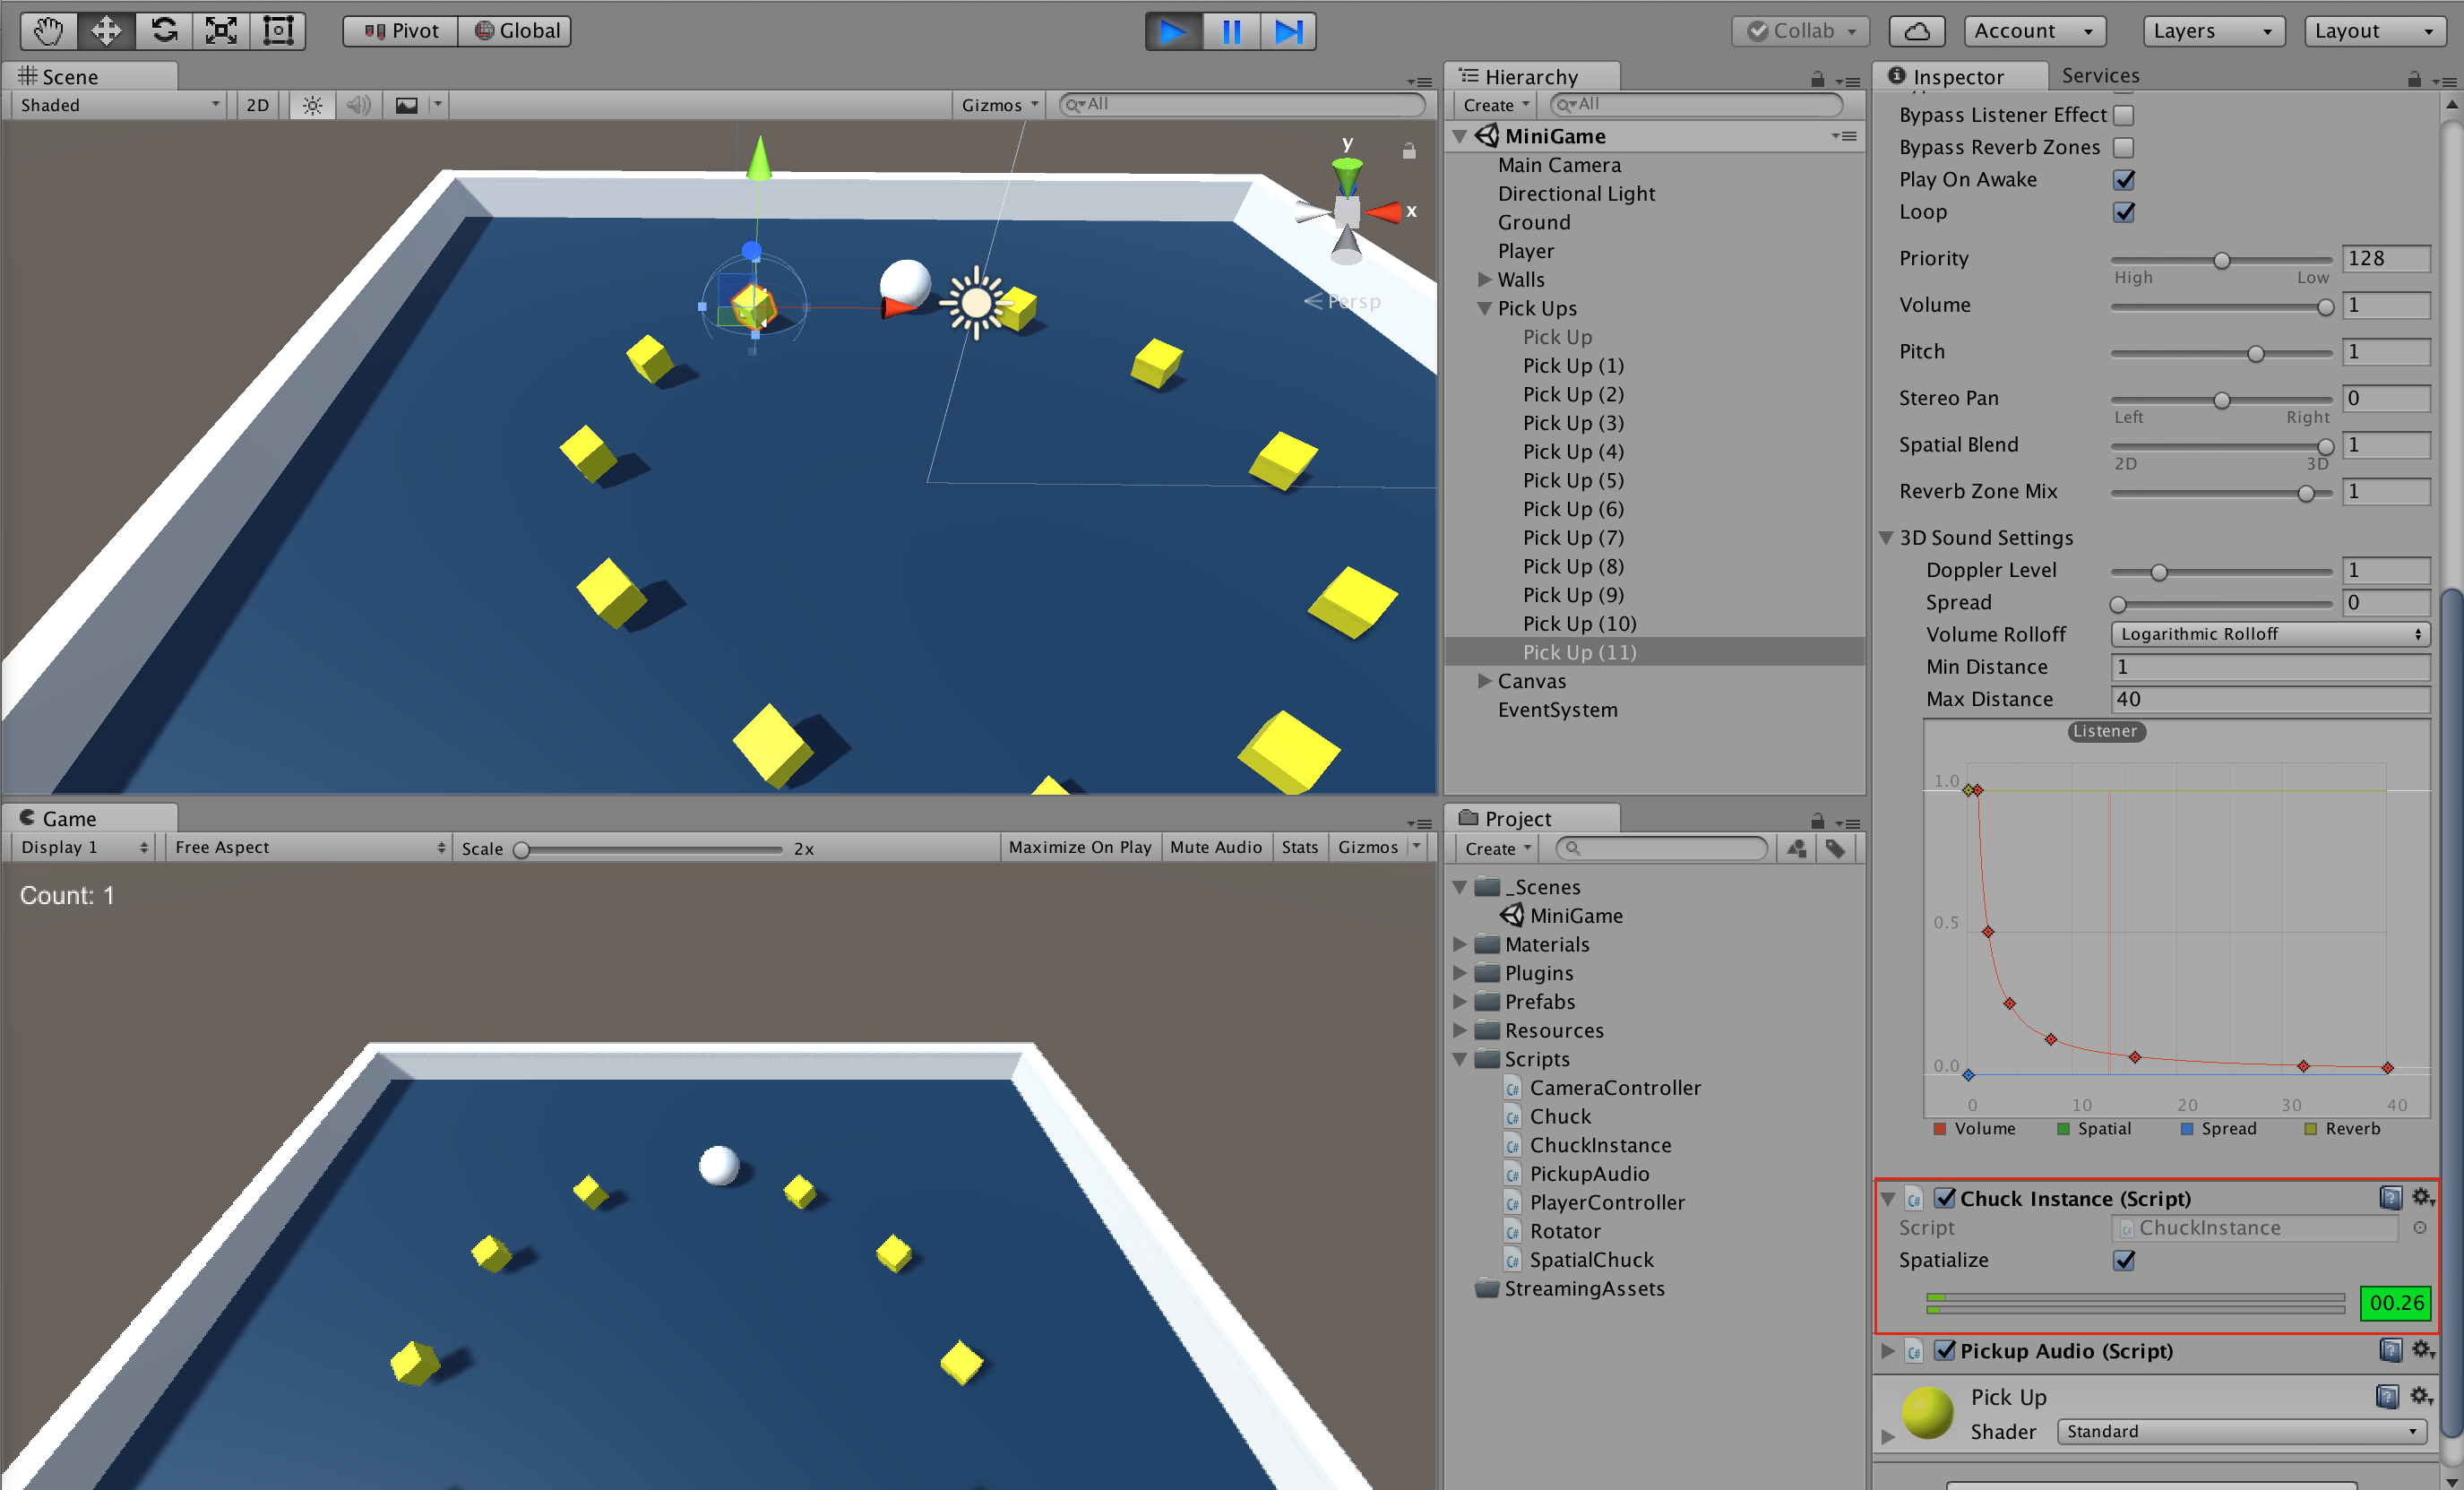
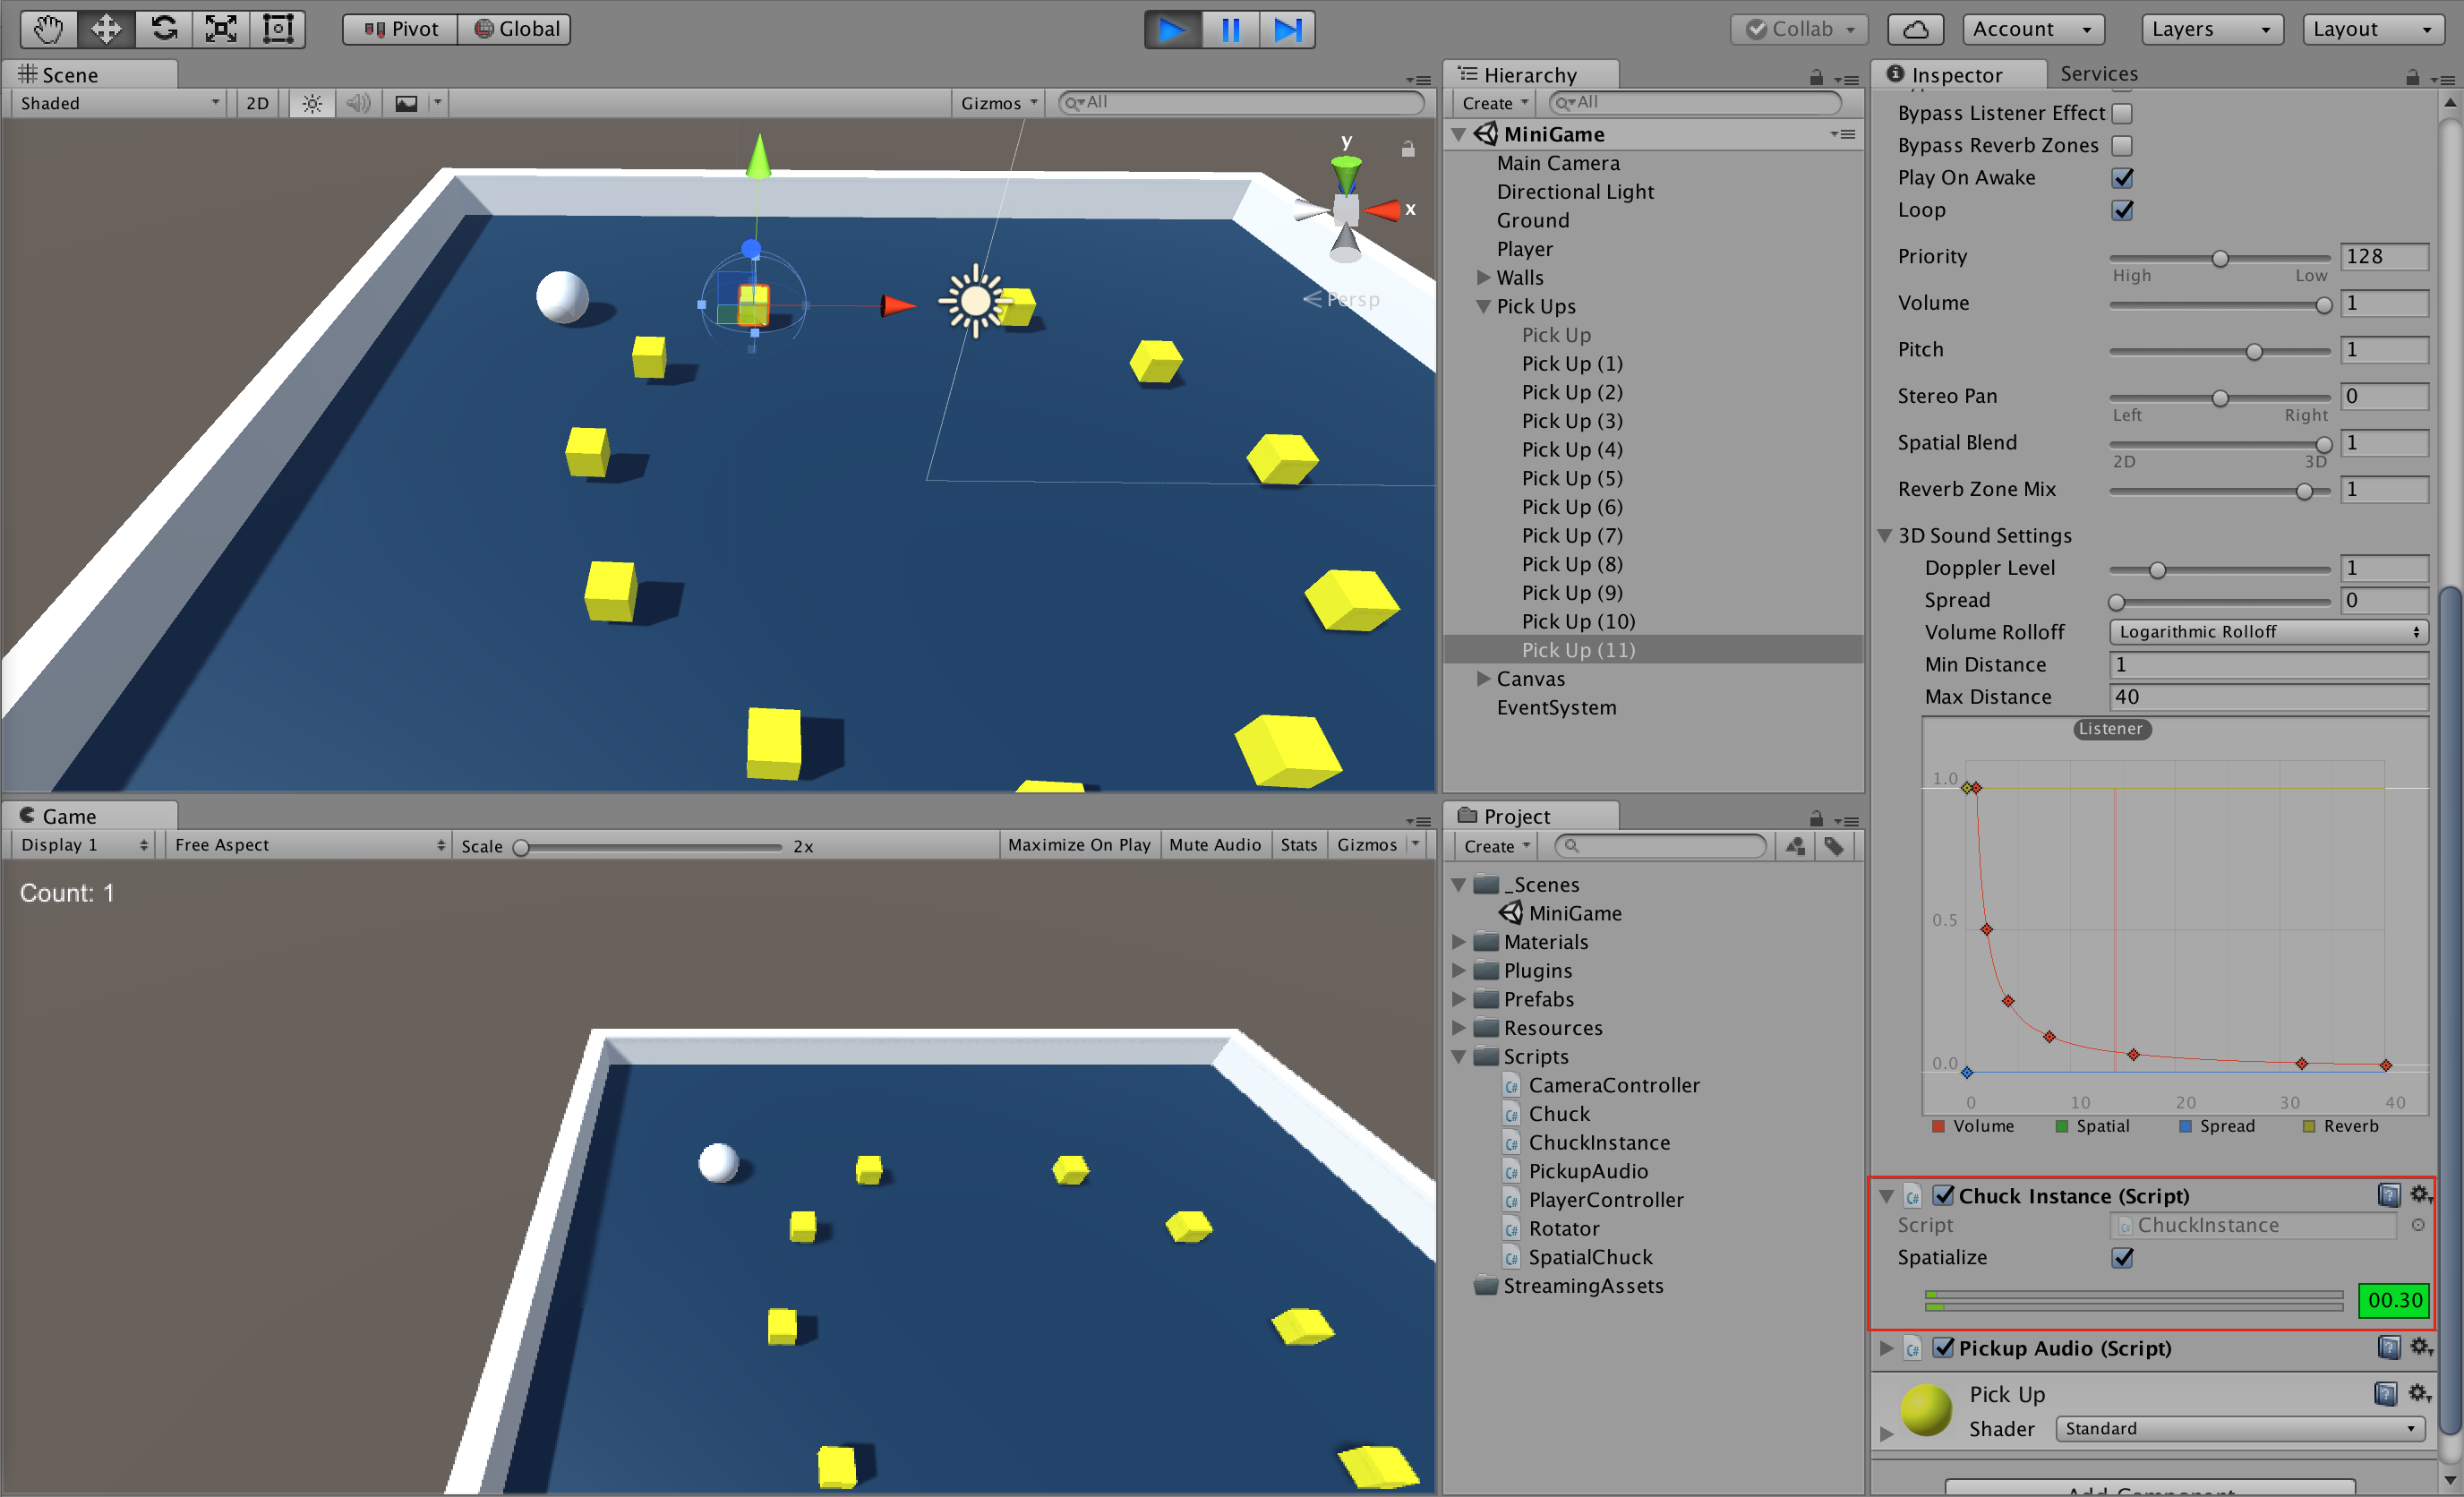
When my Audio Listener (the player) is close to the Audio Source, with the Audio Source
on the left side of the Audio Listener, then the spatialized audio output from
ChucK is loud, with the left channel louder than the right.

And, when my Audio Listener is far from the Audio Source, the spatialized audio
output from ChucK is quieter, with a negligible difference in volume between the two channels.

Congratulations! You've just set up your first spatial audio script in Unity using ChucK!
-
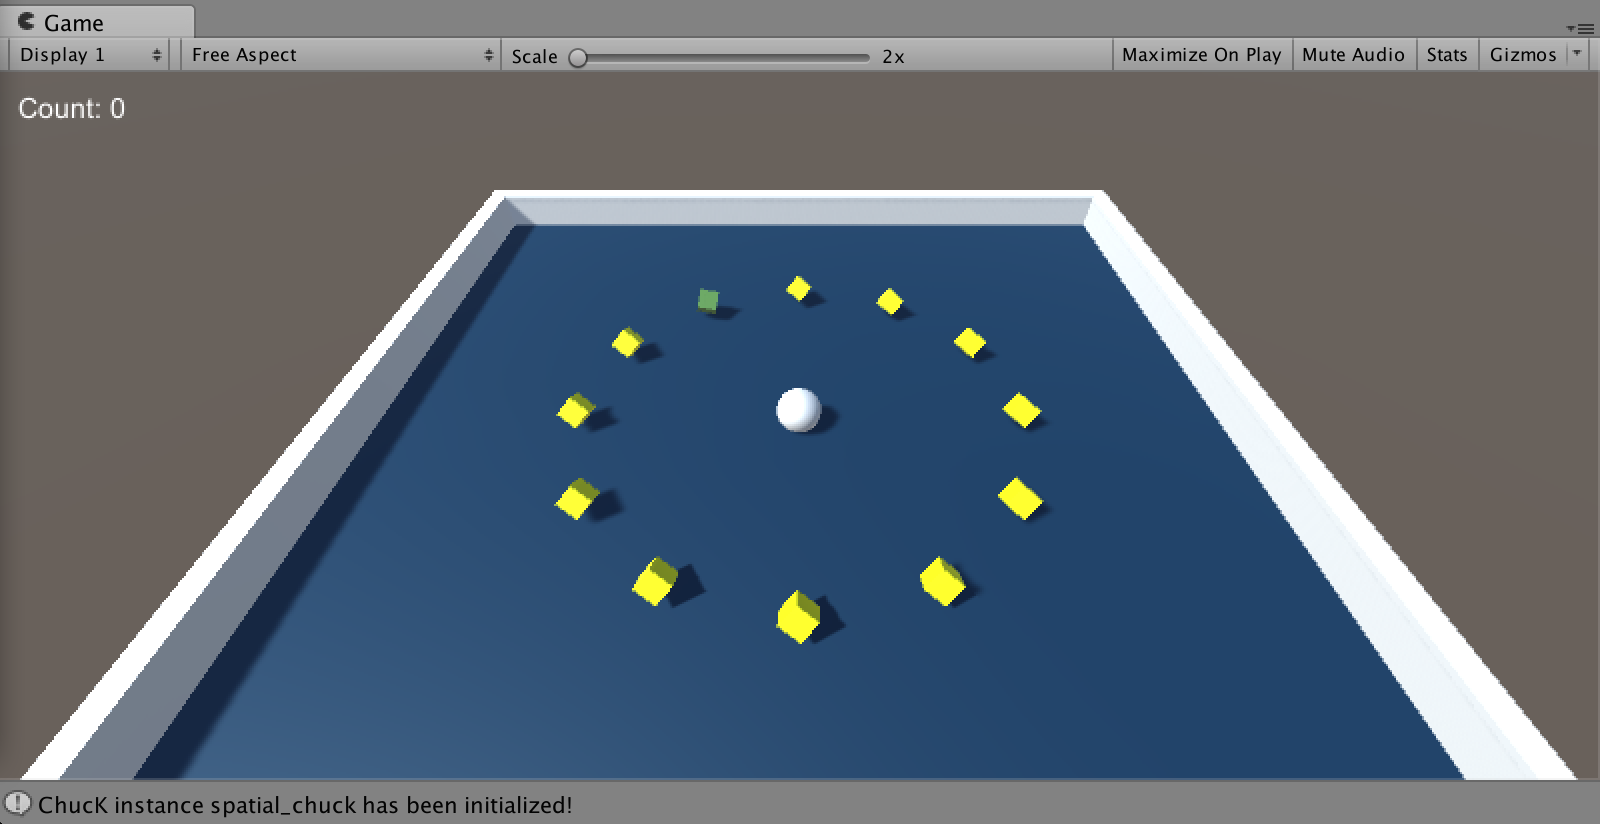
(Addendum) In the spirit of designing audio and visuals in tandem, I'd like to make
the spatialized Pick Up stand out from the rest of the Pick Ups.
This way, there will be a visual cue that corresponds to the spatial sound cues.
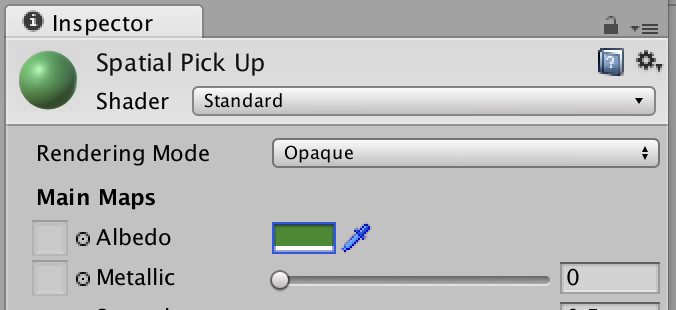
I'll start by making the spatialized Pick Up a different color.
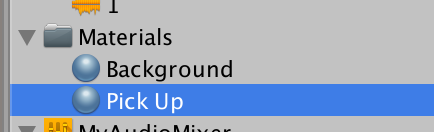
Highlight the Pick Up material in the Project pane.
This material is what gives the Pick Ups their yellow color.

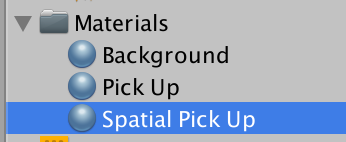
Duplicate it using CTRL-D (Windows) or CMD-D (OS X).

Give the duplicated material a new name. I'll call mine Spatial Pick Up.

Next, I'll change the color of my new material by editing the Albedo property.

There! Now, any object using the Spatial Pick Up material will be colored green.

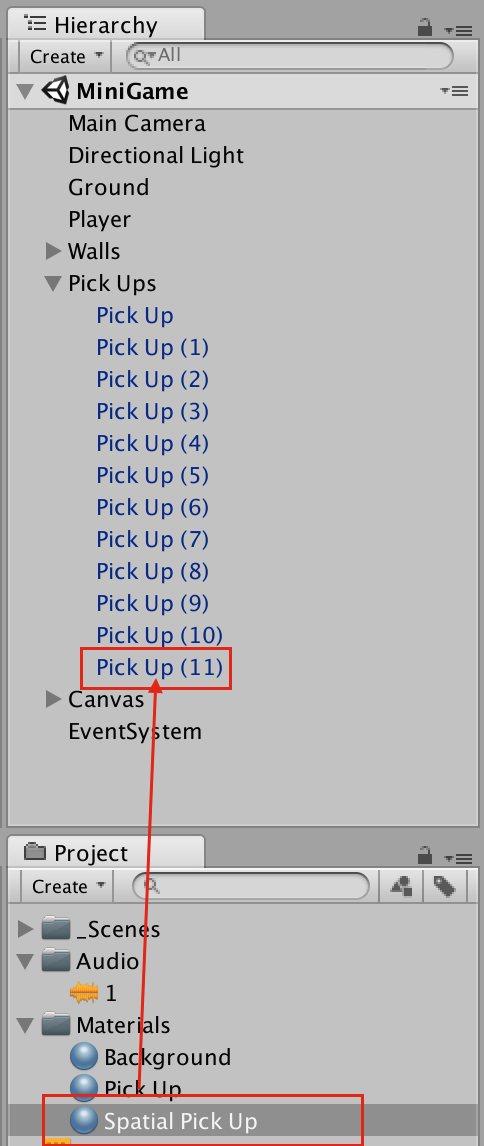
Apply the new material to the Pick Up we added spatialization to by dragging
the material from the Project pane onto the Pick Up in the Hierarchy pane.

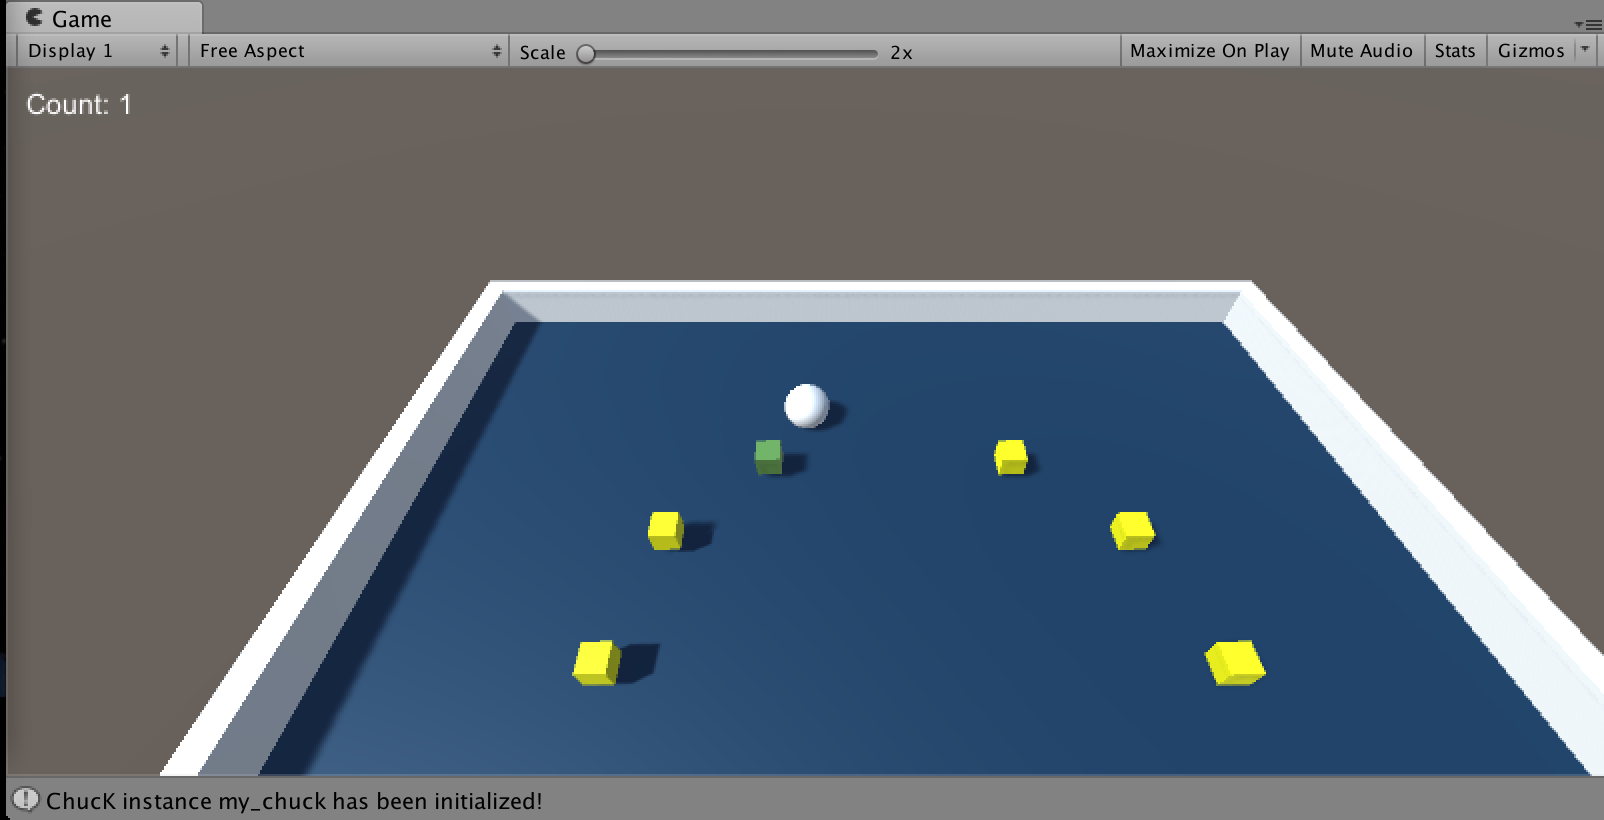
Now, the Pick Up looks different! But, I still don't think that its visual
appearance corresponds very well with the sound of a triangle wave oscillator
with a rapidly-changing frequency...

Let's change this by adding a rapid movement to the spatial Pick Up!
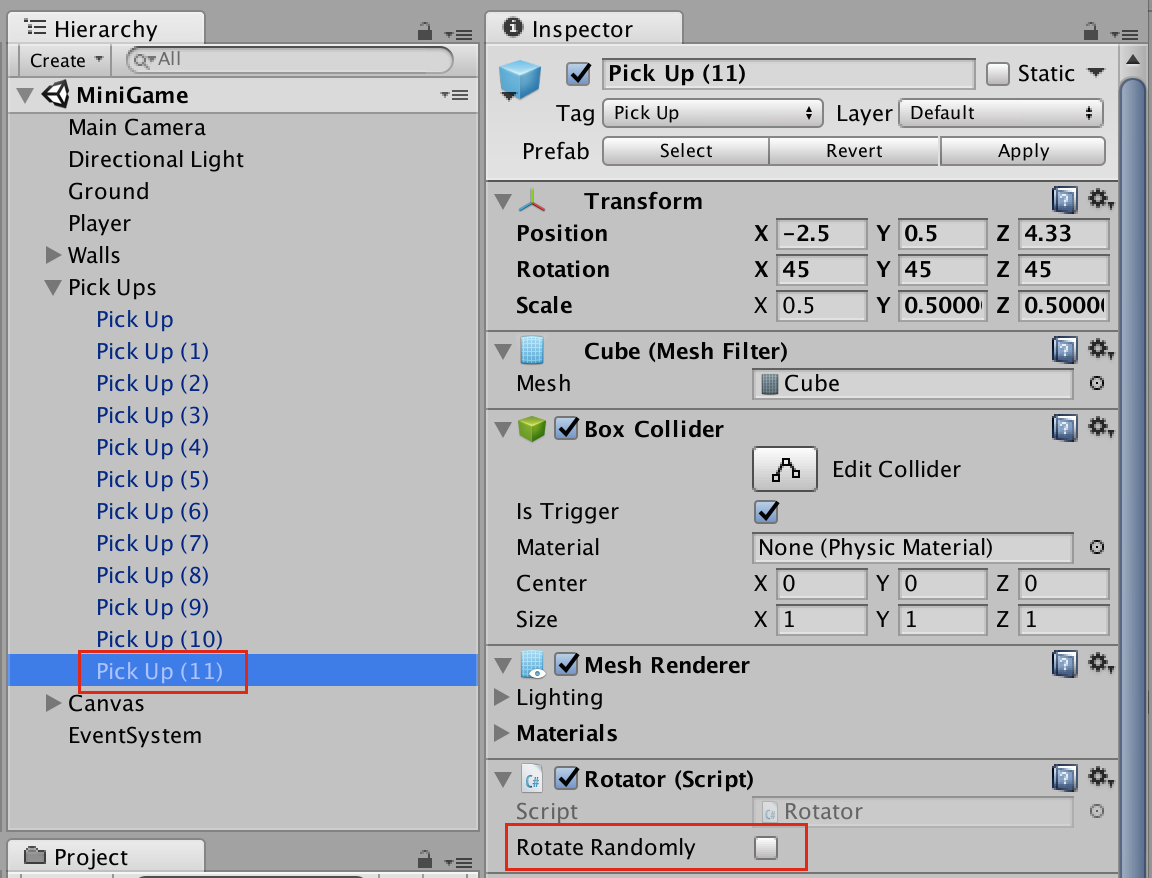
We'll do this by modifying the existing Rotator
class, which is responsible for rotating all the Pick Ups.
Since we want to create a behavior that is turned on only for some
Pick Ups, we'll add a new public boolean that controls whether the behavior
is turned on or off.

Next, we'll add a new Vector3 local variable to
the Update() function. If the rotateRandomly
behavior is enabled, then the rotateAmount vector is
set to have three random values, each selected uniformly from the range
[100, 800).
If rotateRandomly is not enabled, then the
rotateAmount will be the same as it was before we
started modifying this script.
Finally, we'll modify the call to transform.Rotate
to take our new rotateAmount variable.

The last thing to do is to set the new Rotate Randomly boolean to be checked on
for the Pick Up we spatialized earlier.

When you've done that, it will look like this for the spatial Pick Up, but will
remain unchecked for the rest of the Pick Ups.

Now, the spatial Pick Up looks really visually distinct, and its movement aligns
well with the audio it is emitting!

Congratulations! You've finished integrating spatial audio into a ChucK project!
Audio Files
This tutorial will walk through writing a ChucK script that plays an audio
file. The script will play an audio file whenever the Player game object collides
with another game object. The audio file's amplitude and speed of playback will
depend on a Unity variable, added to the script with string formatting.
For any file to be copied directly to the file system for your code to access
during runtime, it must be located inside of a special folder called StreamingAssets.
Create this folder in your Project pane and put an audio file you'd like to
use inside it. My audio file is called impact.wav.

Since I'd like to play this file when the Player collides with another game object,
I'll add an OnCollisionEnter() method to my Player class.
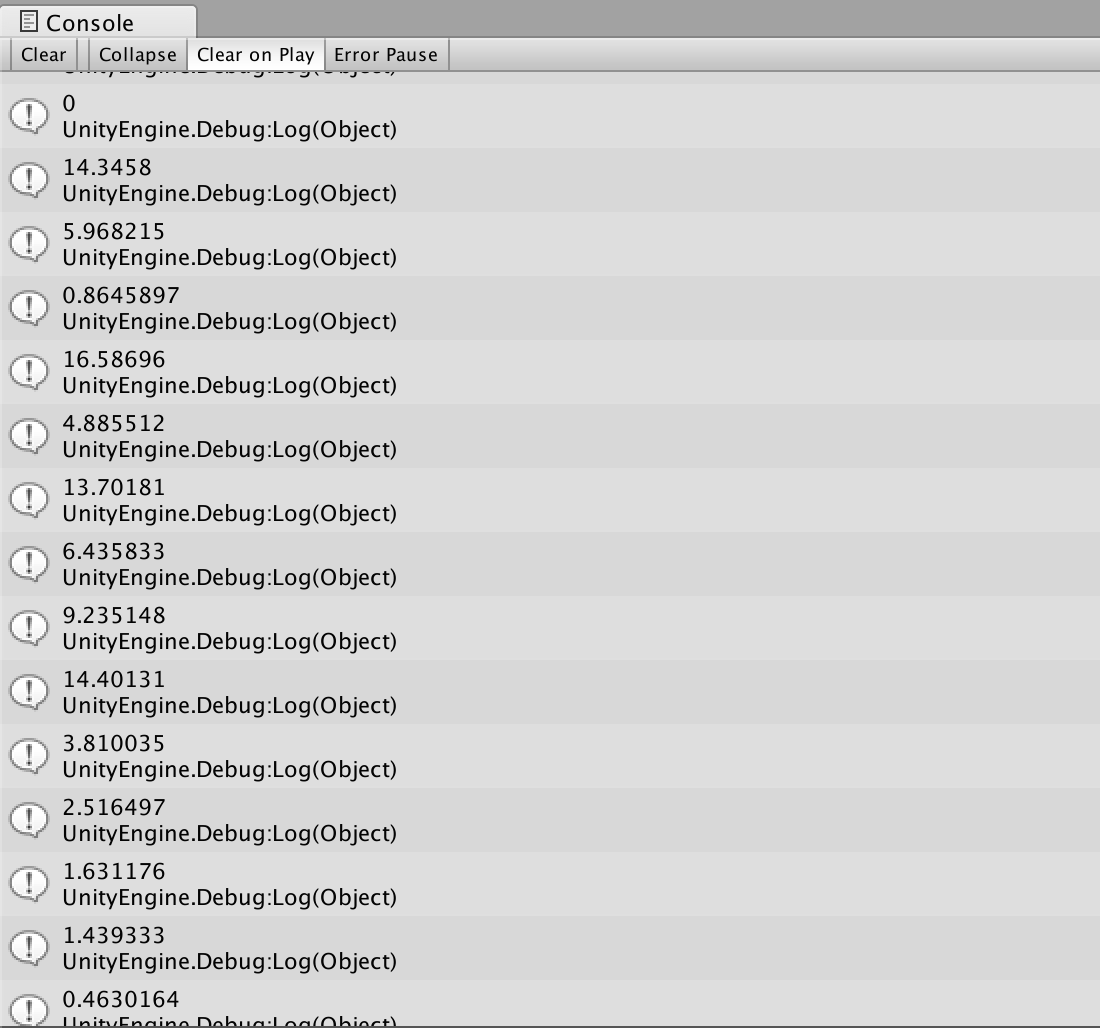
To determine what range of possible values the collision's velocity magnitude
can take on, I'll use Unity's Debug Log to print out the value, enter play
mode, and cause collisions with the game walls at a variety of velocities.

Based on this experiment, it looks like the relevant range of my intensity
variable will be roughly [0, 16].

I'll scale the intensity down to roughly [0, 1] by dividing it by
16, then clamp it to exactly [0, 1].
Finally, I'll square this value so that the sound changes quadratically with an increase in velocity,
rather than linearly. This will help especially fast collisions to stand out more.

Finally, I'll add my ChucK code. The intensity parameter is inserted just as in the
Using Unity Variables(1) tutorial. Note that when
writing multi-line strings, any single quotes " must be
specified by writing "".
The sound file itself is accessed via its filename. Note that in Unity, the
me.dir() ChucK expression refers automatically to the
StreamingAssets folder for code that is run using
Chuck.Manager.RunCode().

It's that simple to write ChucK scripts that use audio files in Unity! Just add your
audio files to the StreamingAssets folder and access their
filenames in ChucK using me.dir().
Printing to the Unity Console
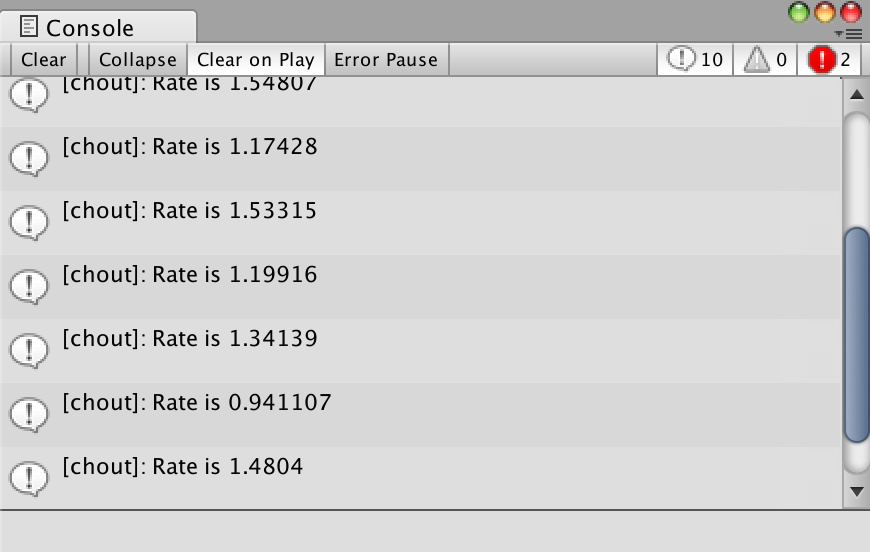
It's easy to write print statements in ChucK that you can see in Unity.
Any print statements written using chout,
cherr, or the "gack" triple-angle-brackets
( <<< "hello, world" >>>; ) will
automatically appear in the Unity console.
For example, this ChucK script computes a value with a random error added to it,
then prints the resulting value to the console.

Using Unity Variables (2): ChucK Global Variables
This tutorial documents ChucK global variables. Using this type of variable
allows you to set and get the values of ChucK variables after a ChucK script
is already running. Currently, it can be applied to ints and floats. It can
also be applied to Events, for which the relevant actions are signaling and
broadcasting the event.
This tutorial will also go over writing a function in ChucK and running that
function in a new shred (the word for threads in ChucK).
Let's start with the ChucK script that we wrote in the Audio Files
tutorial. This ChucK script plays an audio file and exits immediately afterward. The script
is compiled and run every time the Player object has a collision.

In this tutorial, I will translate this script into one that is compiled and run once when
the scene is opened. The new version of the script will trigger the audio file as a result
of communication with Unity using ChucK global variables.
The first thing to do is move the script from OnCollisionEnter()
to Start().

Next, remove the call to string.Format and replace all
of the format locations in the string with a new variable, intensity.
Wrap the entire script into a function called playImpact( float intensity ).

Now, let's add the global variables we will use to signal when this function should be called.
We will set the value of an global float from Unity, and then we
will signal an global Event from Unity to tell the ChucK script
that it should play an impact using the value stored in the global float.
These variables are specified just like regular variables, but with the global
keyword. Note that only global variables can be global, and currently the
only variable types supported are int, float, and Event.

Let's write the code that uses these variables. To wait for an Event to fire,
we simply chuck the event to now. To call the playImpact
function we just defined, but in a new shred, we spork ~ the function
call.
So, forever ( while( true ) ), we will wait for an
impactHappened event, and then call playImpact
with the value stored in impactIntensity.

Finally, in the OnCollisionEnter function, after we compute
the collision's intensity, we first set the value of the float impactIntensity
and then broadcast the event impactHappened. These functions take the string
name of the ChucK plugin as the first argument and the name of the global variable as the second argument,
since each ChucK plugin has its own namespace of global variables.

Congratulations! You've written a script using global variables. This practice allows you to write
slightly more efficient code, since you won't need to send a new script to the ChucK compiler every time you want
to generate sound.
Chugins
It's possible to write additions to ChucK in C++ and compile these additions
as dynamically linked libraries (known as ChuGins).
If you're interested in writing your own ChuGin, check out the
GitHub
repository for more information.
In Unity, any ChuGin that is added to the StreamingAssets
folder is automatically usable in any ChucK script, after Unity has been restarted.
(StreamingAssets is the same folder that is used to store your audio files.)
ChuGins often take the form of new UGens (unit generators), the core objects that
process all audio in ChucK.
For example, if I add the Bitcrusher.chug ChuGin to
my StreamingAssets folder...
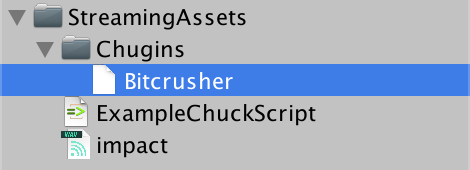
... and restart Unity...

... then, I can write ChucK scripts using the Bitcrusher UGen!
Here, I've modified the Audio File impact script
to process my audio file through a Bitcrusher. To do this, I just added
the Bitcrusher to the signal flow, set its settings, and allowed some extra
time at the end of the audio file to wait for the Bitcrusher's tail of audio
to finish playing.

ChuGins have been used to extend ChucK in pretty fantastic ways. For example,
you can write Faust signal processing code
in ChucK using the Faust ChuGin!
Just add the Faust.chug Chugin to your StreamingAssets folder...

... restart Unity...

... and then, you can write Faust code inside your ChucK code inside your Unity code!

Wow! That's Fausttastic!
Thanks for following these tutorials. Good luck ChucKing in Unity!
|