Difference between revisions of "Bicycaleidoscope"
(→Similar Work) |
|||
| (24 intermediate revisions by 2 users not shown) | |||
| Line 1: | Line 1: | ||
| − | |||
== Bicycaleidoscope: A Giant Musical Kaleidoscope == | == Bicycaleidoscope: A Giant Musical Kaleidoscope == | ||
| + | ''Music 250a, Fall 2013'' | ||
| + | |||
| + | ''Brie Bunge and Sophia Westwood'' | ||
| + | |||
| + | === Summary === | ||
| + | We built a musical instrument in the form of a giant kaleidoscope. Two bike wheels filled with colorful gels spin to control the bass line. Light streams through the gels, reflecting in the kaleidoscope to produce brilliant visual effects that accompany the piece. We generate the harmony and melody via Hall effect sensors that detect magnets on the bike wheels and the input into a machine learning algorithm. | ||
| + | |||
| + | === Reflection === | ||
| + | |||
| + | '''Technical and creative challenges''' | ||
| + | |||
| + | * Building the steel frame to mount the instrument. Involved learning how to diagram, cut, clean, weld, grind, and drill with the steel. | ||
| + | * Mounting the Hall sensors and magnets on the bike wheels such that the sensors accurately and reliably detected the magnets passing by. | ||
| + | * Transforming the binary data from the Hall sensors into music. Iterated on various processing pipelines involving Pure Data, python, OSC, and MainStage. Experimented with different methods for sound synthesis. | ||
| + | |||
| + | '''Future desired changes''' | ||
| + | |||
| + | * Make the music generation more expressive, adding a second Hall effect sensor for each wheel. With a second sensor, we could detect the direction and velocity of each wheel and translate it into more dynamic music generation. We only started learning about music generation in the class, and it would be neat to take the instrument to the next level. | ||
| + | * Add an anti-rust coating to the frame (we're planning to do this after finals week) | ||
| + | * Experiment more with the projection and enhancing the instrument as an installation piece. For example, some ideas are to separate the instrument from the projection (perhaps placing one on a hill), to include more live performance possibly with silhouettes against the visuals, and to experiment with the number of cameras and angles. | ||
| + | |||
| + | '''A few videos capturing the kaleidoscope''' | ||
| + | |||
| + | [https://www.dropbox.com/s/i29h7ojjsvjauh2/2013-12-04%2012.45.21.mp4 A short video of the kaleidoscope visuals] | ||
| + | |||
| + | [https://www.dropbox.com/s/4vjilt6nxpdd9zv/2013-12-04%2012.45.58.mp4 A long video of the visuals as the wheels spin] | ||
| − | === | + | === Progress: Sketches and Photos === |
| Line 38: | Line 63: | ||
[[File:Sensor-mount-sketch.jpg|500px]] | [[File:Sensor-mount-sketch.jpg|500px]] | ||
| + | |||
| + | ---- | ||
| + | |||
| + | '''Popsicle model for rough structure''' | ||
| + | |||
| + | We created a rough small-scale model of how the project would look to help us visualize and discuss the structure. The white pieces model the wheels, the orange rod is the metal rod to mount the wheels, and the triangular piece on the left are the mirrors. | ||
| + | |||
| + | [[File:kaleid-popsicle-model.jpg|500px]] | ||
| + | |||
| + | ---- | ||
| + | |||
| + | '''Inside of the kaleidoscope''' | ||
| + | |||
| + | As a temporary step, we mounted the mirrors in an equilateral triangle and placed them on a table and placed a wheel with gels at the end on the rod. Even this simple step results in impressive visuals, despite the metal rod at the bottom and the lack of a fully-reflective bottom mirror. | ||
| + | |||
| + | [[File:kaleid-inside-nov7.jpg|500px]] | ||
| + | |||
| + | ---- | ||
| + | |||
| + | '''Zooming out on the kaleidoscope''' | ||
| + | |||
| + | This is a larger view of how we created the picture above -- the camera was where Brie is looking. The setup is still rough, but provides a nice proof-of-concept. | ||
| + | |||
| + | [[File:kaleid-brie-nov6.jpg|500px]] | ||
| + | |||
| + | Another angle on the setup: | ||
| + | |||
| + | [[File:kaleid-headon-nov7.jpg|500px]] | ||
| + | |||
| + | ---- | ||
| + | |||
| + | '''Video of the project so far''' | ||
| + | |||
| + | [https://www.dropbox.com/s/bxqyn9094ppmams/2013-11-06%2012.09.55.mp4 A cool video of the setup and inside as the wheel spins] | ||
| + | |||
| + | ---- | ||
| + | |||
| + | '''Connecting up sensors''' | ||
| + | |||
| + | Next we figured out how to use a Hall effect sensor to detect the wheel rotation. Initial attempts with sensors in the lab failed, so we ordered some online. We built a quick wooden mount to secure the sensor in the right place with relation to the wheel, and placed it onto a breadboard attached to the wood, which we wired up to the Arduino. Next, we placed a stack of strong magnets on the spokes of the bike. For aesthetics, we removed half of the spokes from the wheel. | ||
| + | |||
| + | As a result, we could see a flash of ones show up on the connected computer whenever the magnets on the wheel rotated past the sensor! | ||
| + | |||
| + | [[File:kaleid-hall-effect-nov7.jpg|500px]] | ||
| + | |||
| + | [[File: kaleid-with-arduino-nov7.jpg|500px]] | ||
| + | |||
| + | ---- | ||
| + | |||
| + | '''Drilling a hole in the sensor mount''' | ||
| + | |||
| + | [[File:Bicycaleidoscope drill hole in senor mount.jpg|500px]] | ||
| + | |||
| + | ---- | ||
| + | |||
| + | '''Video of the sensors''' | ||
| + | |||
| + | [https://www.dropbox.com/s/c18uuj6bchtg964/2013-11-07%2015.40.06.mp4 A video of the wheel+magnet+sensor as the wheel rotates] | ||
| + | |||
| + | ---- | ||
| + | |||
| + | '''Preparing a second wheel''' | ||
| + | |||
| + | We decided to start preparing a second wheel. We chose the prettiest and largest wheel, but it did not fit on our metal rod. So, Brie went to work to remove the limiting metal on the wheel such that it would fit! | ||
| + | |||
| + | [[File:brie-cutting-wheel-kaleidoscope.jpg|500px]] | ||
| + | |||
| + | ---- | ||
| + | |||
| + | '''Lighting gels''' | ||
| + | |||
| + | [[File:Bicycaleidoscope light gels.jpg|500px]] | ||
| + | |||
| + | ---- | ||
| + | |||
| + | '''Wheel spinning''' | ||
| + | |||
| + | [[File:Bicycaleidoscope wheel spinning.jpg|500px]] | ||
| + | |||
| + | [https://www.dropbox.com/s/748pyd1l2te2g35/2013-11-21%2017.31.19%20-%20music%20wheels%20and%20sensors%20from%20above.mov Sensors and wheels from above] | ||
| + | |||
| + | ---- | ||
| + | |||
| + | '''Sensors''' | ||
| + | |||
| + | [[File:Bicycaleidoscope sensors.jpg|500px]] | ||
| + | |||
| + | ---- | ||
| + | |||
| + | '''Cutting the mirror''' | ||
| + | |||
| + | [[File:Bicycaleidoscope cutting mirror.jpg|500px]] | ||
| + | |||
| + | ---- | ||
| + | |||
| + | '''Cutting gets heated''' | ||
| + | |||
| + | [[File:Bicycaleidoscope its getting hot here.jpg|500px]] | ||
| + | |||
| + | ---- | ||
| + | |||
| + | '''Sketching out a frame''' | ||
| + | |||
| + | So far, we've been mounting the project on the table, with the help of some supply bins. We decided we wanted the final mount to be on a frame of metal tubing. Here are the sketches we used to design the frame and decide on dimensions in preparation for buying the materials. | ||
| + | |||
| + | [[File:kaleidoscope-sketch-mounting.jpg|500px]] | ||
| + | |||
| + | [[File:kaleidoscope-aframe-measure.jpg|500px]] | ||
| + | |||
| + | ---- | ||
| + | |||
| + | '''Building the frame''' | ||
| + | |||
| + | Fueled by Sasha's delicious breakfast burritos, we took a trip together to Alan Steel early in the morning to get our steel pipes. | ||
| + | |||
| + | [[File:alan-steel-morning.jpg|500px]] | ||
| + | |||
| + | [[File:Bicycaleidoscope holding steel.jpg|500px]] | ||
| + | |||
| + | After buying the steel pipes, we cleaned all of the grease off with sandpaper and Simple Green. Here they are after we cut them down to the lengths we needed. | ||
| + | |||
| + | [[File:cleaned-steel-pipes.jpg|500px]] | ||
| + | |||
| + | Steel before and after cleaning | ||
| + | |||
| + | [[File:Bicycaleidoscope before and after cleaning.jpg|500px]] | ||
| + | |||
| + | Steel after cleaning | ||
| + | |||
| + | [[File:Bicycaleidoscope after cleaned.jpg|500px]] | ||
| + | |||
| + | Measuring the steel for cutting | ||
| + | |||
| + | [[File:Bicycaleidoscope measuring.jpg|500px]] | ||
| + | |||
| + | Cutting the steel | ||
| + | |||
| + | [[File:Bicycaleidoscope cutting.jpg|500px]] | ||
| + | |||
| + | We learned how to weld for the first time and began to weld the A-frames: | ||
| + | |||
| + | [[File:welded-aframe.jpg|500px]] | ||
| + | |||
| + | ---- | ||
| + | |||
| + | '''A test set up for the sensors''' | ||
| + | |||
| + | [[File:Bicycaleidoscope sensor test setup.jpg|500px]] | ||
| + | |||
| + | ---- | ||
| + | |||
| + | '''Music experimentation''' | ||
| + | |||
| + | [https://www.dropbox.com/s/x57nnod9nlqjrvf/2013-11-11%2012.35.34%20-%20preliminary%20music%202.mov Preliminary audio accompaniment] | ||
| + | |||
| + | [https://www.dropbox.com/s/68yc5jmf5ve90af/2013-11-11%2012.40.25%20-%20preliminary%20music.mov Preliminary audio accompaniment] | ||
| + | |||
| + | [https://www.dropbox.com/s/f5atdapn3zq61h3/2013-11-21%2020.04.52%20-%20music%20synth%201.mov Music Synth 1] | ||
| + | |||
| + | [https://www.dropbox.com/s/zlrmy9dozpd6xkl/2013-11-21%2019.41.27%20-%20music%20synth%202.mov Music Synth 2] | ||
| + | |||
| + | --- | ||
| + | |||
| + | '''Spray-painting the mirrors''' | ||
| + | |||
| + | We bought teal and purple spray paint, and had a lot of fun spray painting the gray backs of the mirrors: | ||
| + | |||
| + | [[File:kaleid-painting-mirrors.jpg|500px]] | ||
| + | |||
| + | --- | ||
| + | |||
| + | '''Finishing the welding''' | ||
| + | |||
| + | All parts of the frame have been welded! Now we just need to grind down the welds, and drill holes to bolt the pieces together. | ||
| + | |||
| + | [[File:kaleid-finish-weld.jpg|500px]] | ||
| + | |||
| + | ---- | ||
| + | |||
| + | '''Completing the frame''' | ||
| + | |||
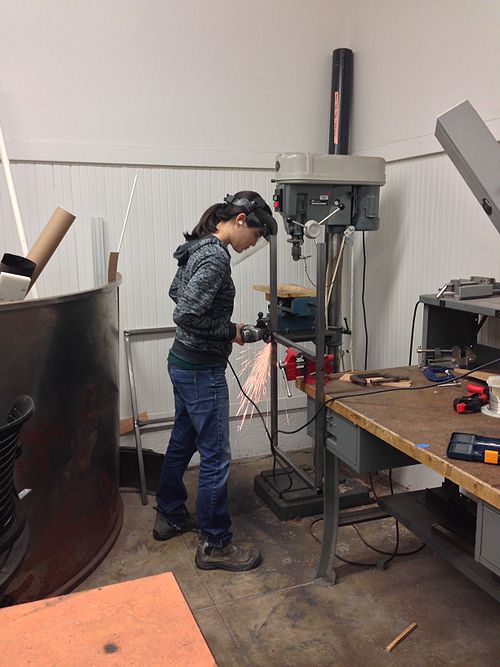
| + | Here's Brie grinding down the welds to make the frame more aesthetic: | ||
| + | |||
| + | [[File:kaleid-brie-steel-grinding.jpg|500px]] | ||
| + | |||
| + | [[File:Bicycaleidoscope sophia steel grinding.jpg|500px]] | ||
| + | |||
| + | Before grinding the weld | ||
| + | |||
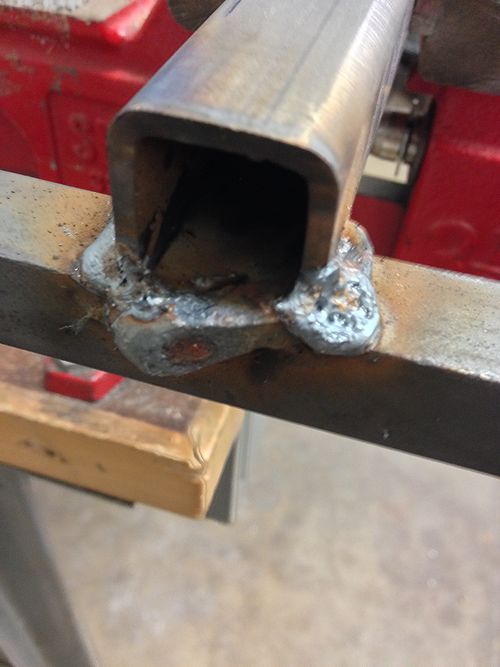
| + | [[File:Bicycaleidoscope weld before.jpg|500px]] | ||
| + | |||
| + | After grinding the weld | ||
| + | |||
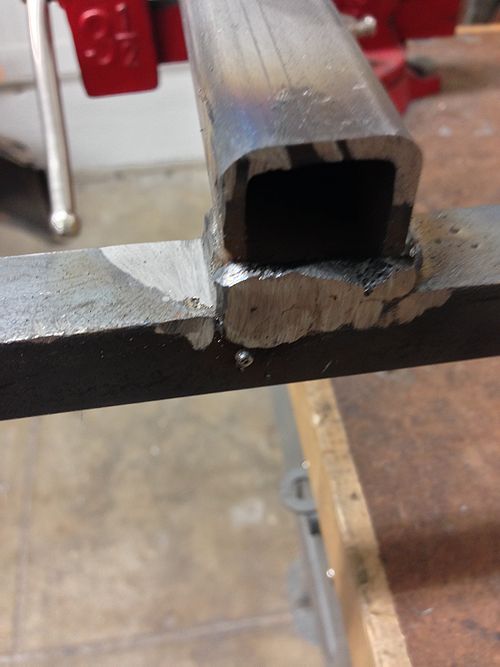
| + | [[File:Bicycaleidoscope weld after.jpg|500px]] | ||
| + | |||
| + | We prepare to drill the holes for the bolts: | ||
| + | |||
| + | [[File:kaleid-drill-holes-frame.jpg|500px]] | ||
| + | |||
| + | [[File:Bicycaleidoscope sophia steel drilling.jpg|500px]] | ||
| + | |||
| + | --- | ||
| + | |||
| + | '''Assembling the frame'' | ||
| + | |||
| + | It fits! And it is very stable after tightening up the bolts. | ||
| + | |||
| + | [[File:kaleid-brie-assembly-first.jpg|500px]] | ||
| + | |||
| + | --- | ||
| + | |||
| + | '''The end results''' | ||
| + | |||
| + | The camera points inside the kaleidoscope and projects the image for the audience. | ||
| + | |||
| + | [[File:kaleid-camera-setup-pretty.jpg|500px]] | ||
| + | |||
| + | [[File:Bicycaleidoscope projector.jpg|500px]] | ||
| + | |||
| + | [[File:Bicycaleidoscope Screenshot 2013-12-05 21.24.07.png|500px]] | ||
| + | |||
| + | Video camera used to project kaleidoscope | ||
| + | |||
| + | [[File:Bicycaleidoscope 2013-12-04 12.51.14.jpg|500px]] | ||
| + | |||
| + | The finished instrument: | ||
| + | |||
| + | [[File:kaleid-full-pretty.jpg|500px]] | ||
| + | |||
| + | [https://www.dropbox.com/s/eqpdky478rb5roh/2013-12-01%2023.34.33.mov Description of Project] | ||
=== Similar Work === | === Similar Work === | ||
| + | '''Papers''' | ||
| − | + | [http://ieeexplore.ieee.org/stamp/stamp.jsp?tp=&arnumber=1278690 Discussion of the Iamascope and other musical interactions] | |
| − | [ | + | [http://ieeexplore.ieee.org/xpls/abs_all.jsp?arnumber=671015&tag=1 Interactive electronic kaleidoscope: The Iamascope] |
| + | [http://ieeexplore.ieee.org/xpls/abs_all.jsp?arnumber=713302 Extension of the Iamascope with jazz and drums] (great pictures) | ||
| − | A giant digital kaleidoscope which is activated by the participation of the viewer | + | |
| + | '''A giant digital kaleidoscope which is activated by the participation of the viewer''' | ||
| + | |||
| + | Takeaway: Viewers enjoy interacting with the kaleidoscope, so we should make sure that viewers can be expressive and creative in their interactions. Also, giant kaleidoscopes are awesome! | ||
[[File:Nationalmuseum-sg-giant-digital-kaleidoscope.jpg|500px]] | [[File:Nationalmuseum-sg-giant-digital-kaleidoscope.jpg|500px]] | ||
| − | Recycled bicycle sculpture | + | '''Bike Wheel Art''' |
| + | |||
| + | Takeaway: This is great inspiration for how we might want to incorporate colors into the bike wheel spokes. | ||
| + | |||
| + | [[File:Bike-wheel-art.jpg|300px]] [[File:Bike-wheel-art-2.jpg|300px]] | ||
| + | |||
| + | |||
| + | '''Bike rack tree''' | ||
| + | |||
| + | Takeaway: Love this beautiful bike rack tree. We could go with a more junkyard aesthetic, like some of the other images here. But, going with this more minimalist/clean aesthetic could perhaps have more of a wow factor, like in this case. | ||
| + | |||
| + | [[File:Bike-rack-tree.jpg|500px]] | ||
| + | |||
| + | |||
| + | '''Three bikes mounted together as a tree''' | ||
| + | |||
| + | Takeaway: The bike frame/part aesthetic is appealing. | ||
| + | |||
| + | [[File:Tri-bike-tree.jpg|500px]] | ||
| + | |||
| + | |||
| + | '''Recycled bicycle sculpture''' | ||
| + | |||
| + | Takeaway: Another incorporation/celebration of the junkyard aesthetic | ||
[[File:Recycled-bicycle-sculpture.jpg|500px]] | [[File:Recycled-bicycle-sculpture.jpg|500px]] | ||
| − | DIY homemade giant kaleidoscope | + | '''DIY homemade giant kaleidoscope''' |
| + | |||
| + | Takeaway: Light and colors make the kaleidoscope more visually engaging | ||
[[File:Homemade-giant-kaleidoscope.jpg|500px]] | [[File:Homemade-giant-kaleidoscope.jpg|500px]] | ||
| − | Giant kaleidoscope made for an event a Tate Modern in 2008 | + | '''Giant kaleidoscope made for an event a Tate Modern in 2008''' |
| − | + | Takeaway: People seem to enjoy playing with the altered visual state that kaleidoscopes create | |
| − | .. | + | [[File:Tate-giant-kaleidoscope.jpg|500px]] [[File:Tate-giant-kaleidoscope-inside.jpg|300px]] |
| − | |||
| − | + | '''Sunrise Bike Wheel Kaleidoscope''' | |
| − | Sunrise Bike Wheel Kaleidoscope | + | |
Bicycle wheel with an axle extending out of the side that can be used as a handle while the bike wheel spins. This video shows footage from a camera mounted at the center of the wheel, mirrored four times. | Bicycle wheel with an axle extending out of the side that can be used as a handle while the bike wheel spins. This video shows footage from a camera mounted at the center of the wheel, mirrored four times. | ||
| Line 78: | Line 361: | ||
=== Need/Want/Have === | === Need/Want/Have === | ||
| + | |||
| + | '''NEED: Things you need to have done for a minimal viable product''' | ||
| + | |||
| + | * Mount bicycle wheels so that they can stand and we can spin them. | ||
| + | * Modify the inside of the wheels by attaching gels, colorful beads, and perhaps altering the spokes to create interesting visual effects when spun. | ||
| + | * Place a triangle of mirrors such that looking through the triangle reflects the bike wheels in cool ways. | ||
| + | * Attach sensors (magnets and hall effect sensors) to detect bike wheel movement. | ||
| + | * Hook sensors up to an Arduino. | ||
| + | * Write code to interface with the Arduino that reads out velocity and acceleration for each bike wheel. | ||
| + | * Send the velocity and acceleration data to a music generation system that uses these parameters to make sound. The music should depend on the motion of the bike wheels to make the interaction, visuals, and acoustics feel connected. | ||
| + | ** At the most basic level, the music generation system could just map the wheels to different voices (soprano, alto, tenor, and bass, assuming four wheels) and, similar to tone matrices, use a pentatonic scale to make the voices sound good together. Another simple (less smooth-sounding) option would be for the wheel velocity to control the pitch/tempo, and for different bike wheels to map to different timbres. | ||
| + | |||
| + | '''WANT: Things that you want to have done by the final deadline''' | ||
| + | * A camera + projector set up so that the view inside the mirrors can be seen by a larger audience | ||
| + | * A consistent look, sound, and feel to the instrument (grunge, elegant, artsy, etc) | ||
| + | * The music generation system will learn from a corpus of scores to build up a database of note sequences. Now, suppose that we spin the first wheel. We will use the velocity of the wheel to control the tempo of the music that is probabilistically generated using the database. Now, let us spin the other wheels. We use each of these to control the average note length of harmony that is probabilistically generated given the lead track. | ||
| + | |||
| + | '''NICE TO HAVE: Things that would be nice to have if you had unlimited time.''' | ||
| + | * A variety of sensors to allow a wider range of interaction with the kaleidoscope (perhaps detecting taps on the bike wheels, shaking of the rod, etc) | ||
| + | * The interaction between the wheels affects the resulting sound (ie, one wheel spinning fast while the other spins slowly is not just the combination of the individual wheels). | ||
=== Elevator Pitch === | === Elevator Pitch === | ||
| + | |||
| + | We are building a giant musical kaleidoscope with bike wheels. The musician spins bike wheels with colorful gels to create awesome visual effects while sensors translate the wheel movement into music. A large kaleidoscope triangle of mirrors reflect the visuals while Hall effect sensors pick up the wheel acceleration and velocity and translate the activity into music. | ||
=== List of Materials === | === List of Materials === | ||
| + | |||
| + | ''Necessary'' | ||
| + | |||
| + | - 1 to 3 bike wheels | ||
| + | |||
| + | - A rod (metal) to mount the bike wheels | ||
| + | |||
| + | - Hall effect sensors (probably 1-3) to detect movement of the bike wheels | ||
| + | |||
| + | - Small magnets (+ a way to mount them to the wheels) for the Hall effect sensors | ||
| + | |||
| + | - Arduino + computer (or Raspberry Pi), speakers | ||
| + | |||
| + | - Wires, connectors for joining sensors with Arduino + computer | ||
| + | |||
| + | - 3 long mirrors for creating the triangle of mirrors | ||
| + | |||
| + | - Three 60 degree rigid angles (metal, wood, etc) plus fasteners to secure the mirrors into the triangle | ||
| + | |||
| + | - Washers and possibly nuts for holding the bike wheels in place | ||
| + | |||
| + | - Colorful gels for placing on the bike wheels (likely colorful beads etc as well) | ||
| + | |||
| + | - Frame for mounting bike wheels and mirror in the right relation to each other | ||
| + | |||
| + | ''Likely'' | ||
| + | |||
| + | - A camera and projector to take the view from the mirror tunnel and make it more broadly accessible (+projection screen) | ||
| + | |||
| + | - Sensors on other parts of the mount for other audio effects | ||
| + | |||
| + | - Spotlight to have enough light for the kaleidoscope effect | ||
| + | |||
| + | - Clip-on weights for the bike wheels for more interesting rotation | ||
=== Steps for Minimal Viable Product === | === Steps for Minimal Viable Product === | ||
| + | - Mount 1-3 bike wheels onto a rod with color gels and beads to create an interesting visual effect. | ||
| + | |||
| + | - Place a triangle of mirrors such that looking through the triangle reflects the bike wheels in cool ways. | ||
| + | |||
| + | - Mount sensors onto the instrument to sense the movement of the bike wheels (at least one bike wheel for MVP). | ||
| + | |||
| + | - Connect the sensors with an Arduino + Raspberry Pi (or computer) and translate the sensor input into basic musical output (perhaps simple pitch and modulation for MVP). | ||
Latest revision as of 22:31, 5 December 2013
Contents
Bicycaleidoscope: A Giant Musical Kaleidoscope
Music 250a, Fall 2013
Brie Bunge and Sophia Westwood
Summary
We built a musical instrument in the form of a giant kaleidoscope. Two bike wheels filled with colorful gels spin to control the bass line. Light streams through the gels, reflecting in the kaleidoscope to produce brilliant visual effects that accompany the piece. We generate the harmony and melody via Hall effect sensors that detect magnets on the bike wheels and the input into a machine learning algorithm.
Reflection
Technical and creative challenges
- Building the steel frame to mount the instrument. Involved learning how to diagram, cut, clean, weld, grind, and drill with the steel.
- Mounting the Hall sensors and magnets on the bike wheels such that the sensors accurately and reliably detected the magnets passing by.
- Transforming the binary data from the Hall sensors into music. Iterated on various processing pipelines involving Pure Data, python, OSC, and MainStage. Experimented with different methods for sound synthesis.
Future desired changes
- Make the music generation more expressive, adding a second Hall effect sensor for each wheel. With a second sensor, we could detect the direction and velocity of each wheel and translate it into more dynamic music generation. We only started learning about music generation in the class, and it would be neat to take the instrument to the next level.
- Add an anti-rust coating to the frame (we're planning to do this after finals week)
- Experiment more with the projection and enhancing the instrument as an installation piece. For example, some ideas are to separate the instrument from the projection (perhaps placing one on a hill), to include more live performance possibly with silhouettes against the visuals, and to experiment with the number of cameras and angles.
A few videos capturing the kaleidoscope
A short video of the kaleidoscope visuals
A long video of the visuals as the wheels spin
Progress: Sketches and Photos
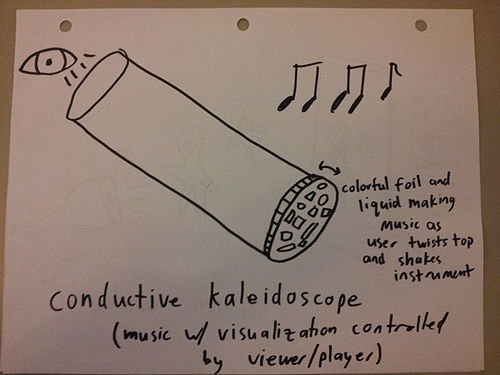
Early sketch of a musical kaleidoscope:
This sketch came from the brainstorming assignment for class -- the initial idea is a small, handheld kaleidoscope where the music syncs up with the visualization.
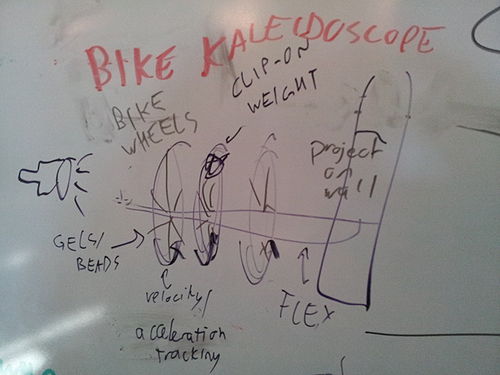
Design sketch of a larger, more public musical kaleidoscope experience:
Design discussions with Sasha led to the idea of using bike wheels and a spotlight to project a kaleidoscope onto a wall, with Hall sensors to track the velocity and acceleration. This sketch shows a series of bike wheels mounted on a rod. The idea is that the musician would spin the bike wheels by hand to control both the musical output and the visual results.
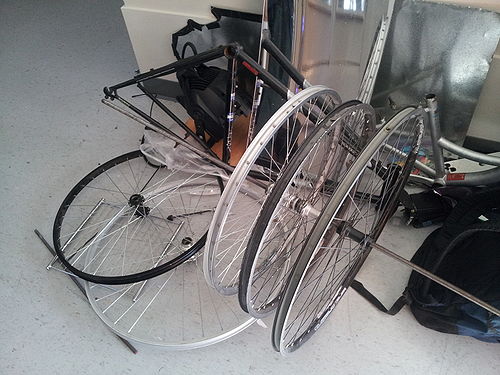
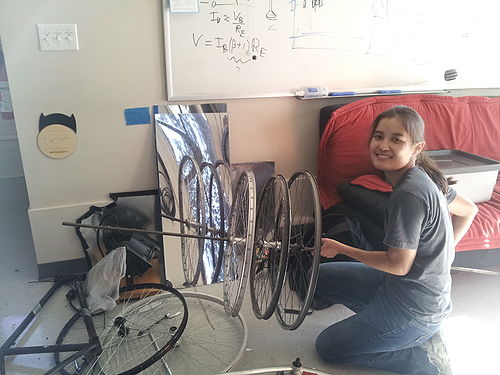
Starting to build the instrument:
We procured bike wheels from the bike store and a metal rod from the garage and started to set up the instrument. We experimented with using the bike frames (in the background) as part of the mounting system. The mirrors (also in the background) will form the tunnel of the kaleidoscope. Our experimentation with the wheels and the mirrors proved that the mirror tunnel is key to the visual effect of the kaleidoscope -- otherwise, only having spinning gels and beads feels a little lame.
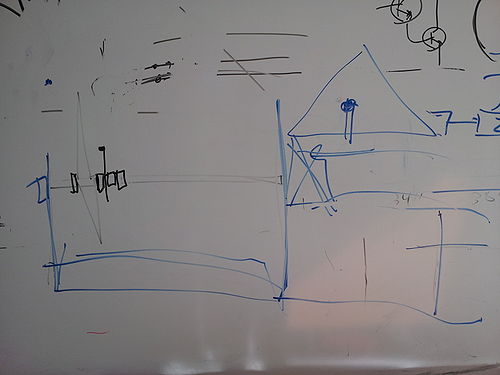
Sketch for mounting the sensors
Now that the bike wheels are mounted, we started to think about how to incorporate sensors into the instrument. This idea is to mount the Hall effect sensors on the rod itself (stationary), to track the bike wheel movement. Then, the mirror will cover only the bottom half of the bike wheel, so that the sensor does not interfere with the visual effect.
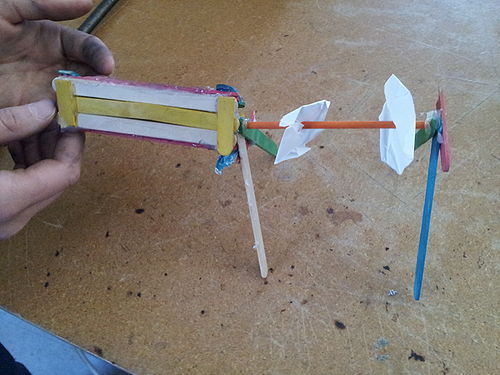
Popsicle model for rough structure
We created a rough small-scale model of how the project would look to help us visualize and discuss the structure. The white pieces model the wheels, the orange rod is the metal rod to mount the wheels, and the triangular piece on the left are the mirrors.
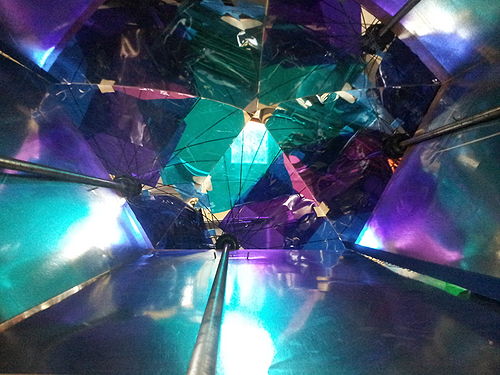
Inside of the kaleidoscope
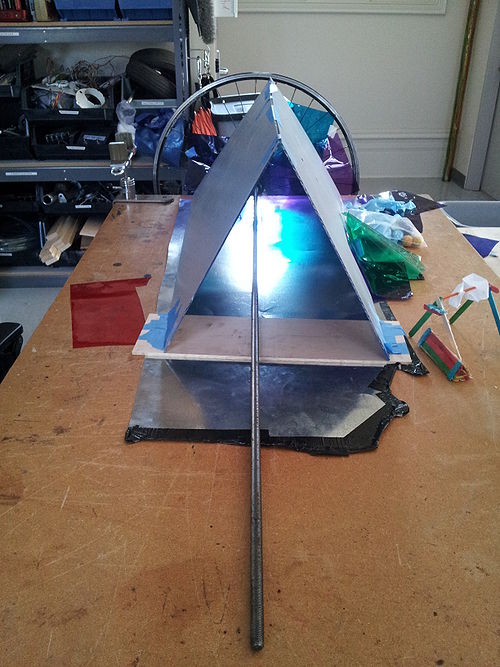
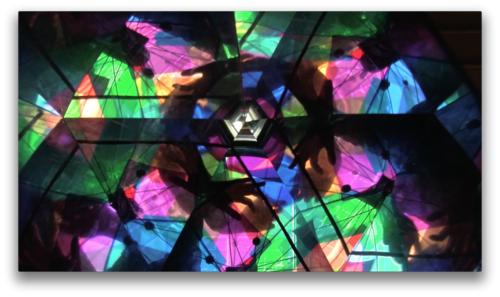
As a temporary step, we mounted the mirrors in an equilateral triangle and placed them on a table and placed a wheel with gels at the end on the rod. Even this simple step results in impressive visuals, despite the metal rod at the bottom and the lack of a fully-reflective bottom mirror.
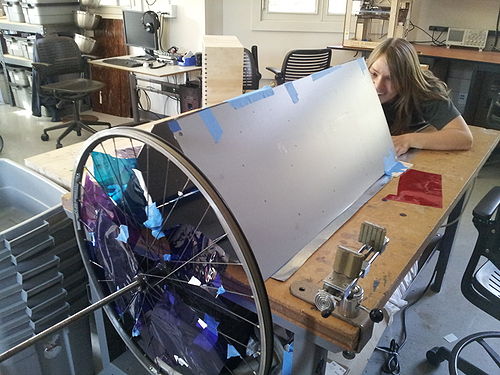
Zooming out on the kaleidoscope
This is a larger view of how we created the picture above -- the camera was where Brie is looking. The setup is still rough, but provides a nice proof-of-concept.
Another angle on the setup:
Video of the project so far
A cool video of the setup and inside as the wheel spins
Connecting up sensors
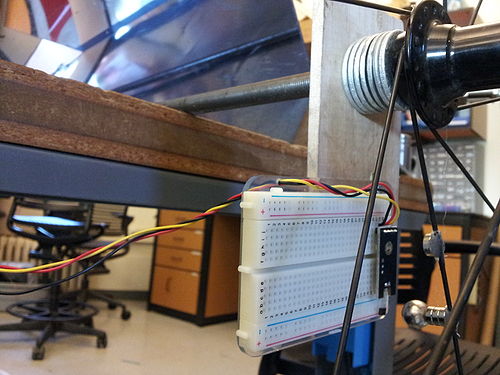
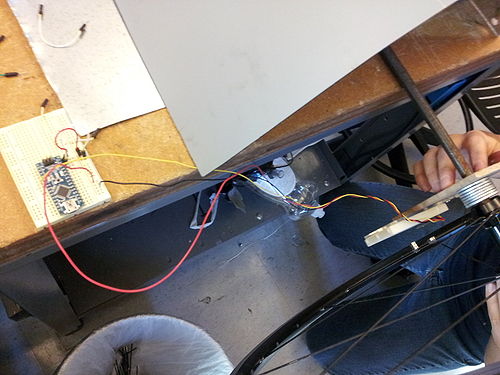
Next we figured out how to use a Hall effect sensor to detect the wheel rotation. Initial attempts with sensors in the lab failed, so we ordered some online. We built a quick wooden mount to secure the sensor in the right place with relation to the wheel, and placed it onto a breadboard attached to the wood, which we wired up to the Arduino. Next, we placed a stack of strong magnets on the spokes of the bike. For aesthetics, we removed half of the spokes from the wheel.
As a result, we could see a flash of ones show up on the connected computer whenever the magnets on the wheel rotated past the sensor!
Drilling a hole in the sensor mount
Video of the sensors
A video of the wheel+magnet+sensor as the wheel rotates
Preparing a second wheel
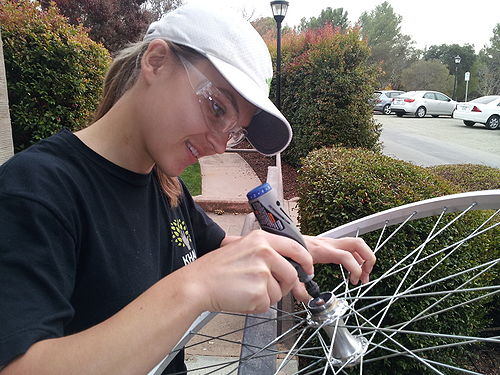
We decided to start preparing a second wheel. We chose the prettiest and largest wheel, but it did not fit on our metal rod. So, Brie went to work to remove the limiting metal on the wheel such that it would fit!
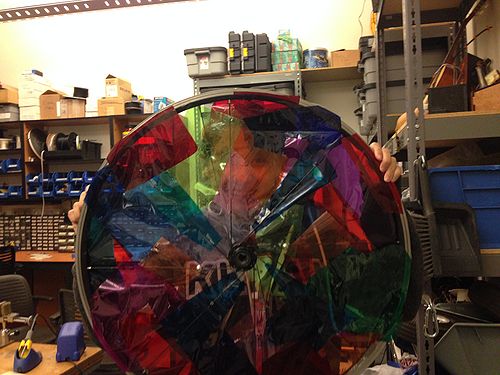
Lighting gels
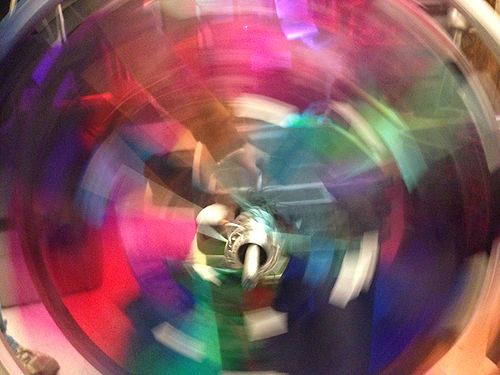
Wheel spinning
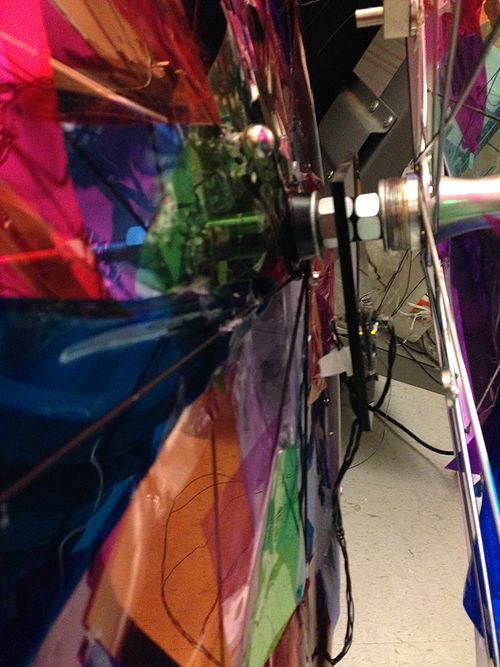
Sensors
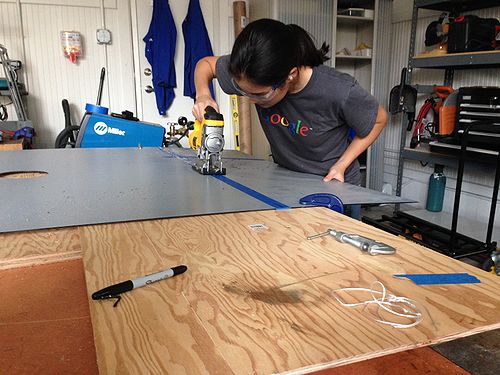
Cutting the mirror
Cutting gets heated
Sketching out a frame
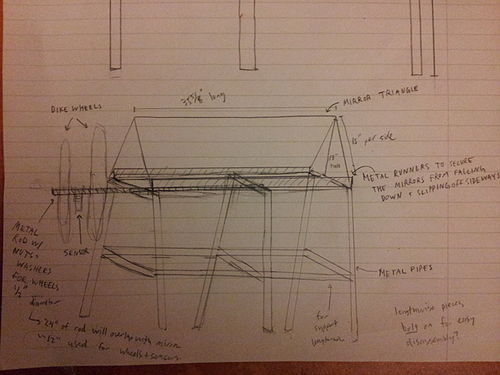
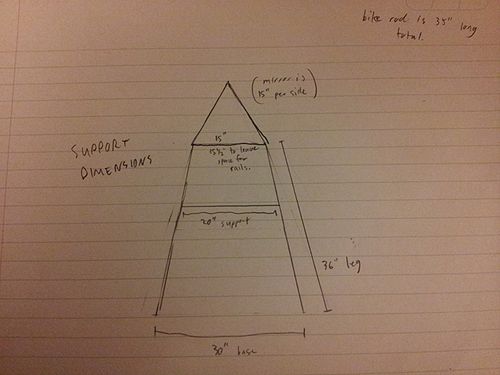
So far, we've been mounting the project on the table, with the help of some supply bins. We decided we wanted the final mount to be on a frame of metal tubing. Here are the sketches we used to design the frame and decide on dimensions in preparation for buying the materials.
Building the frame
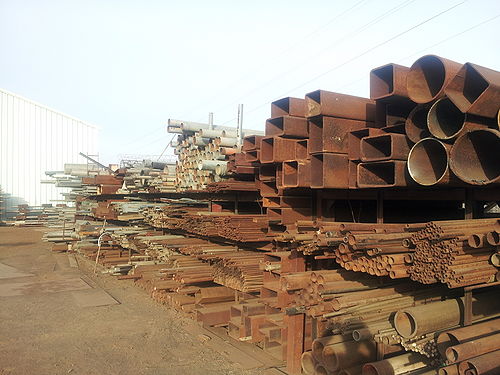
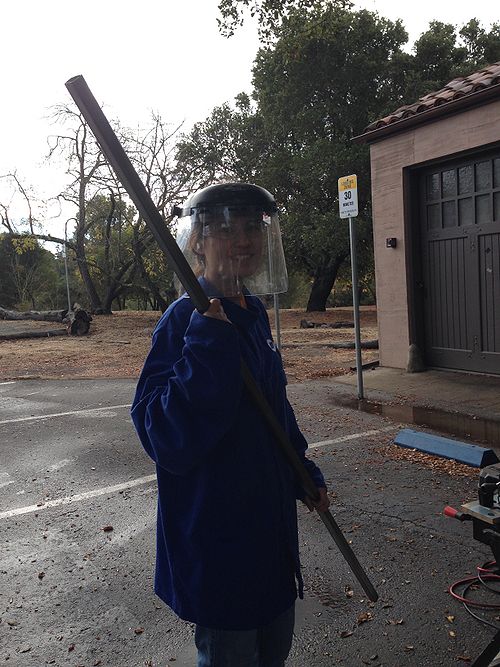
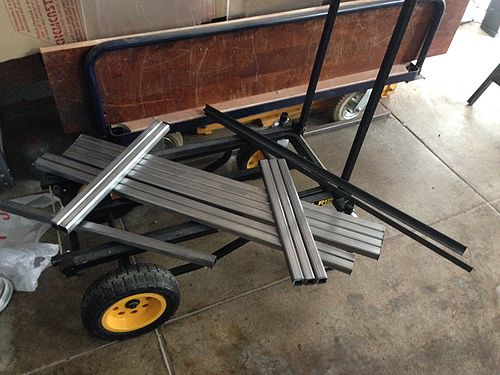
Fueled by Sasha's delicious breakfast burritos, we took a trip together to Alan Steel early in the morning to get our steel pipes.
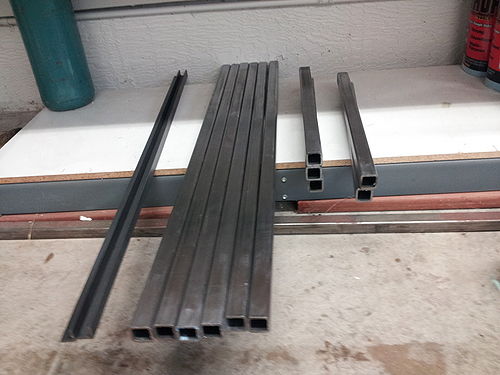
After buying the steel pipes, we cleaned all of the grease off with sandpaper and Simple Green. Here they are after we cut them down to the lengths we needed.
Steel before and after cleaning
Steel after cleaning
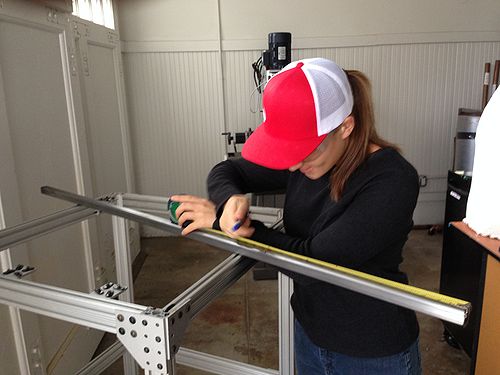
Measuring the steel for cutting
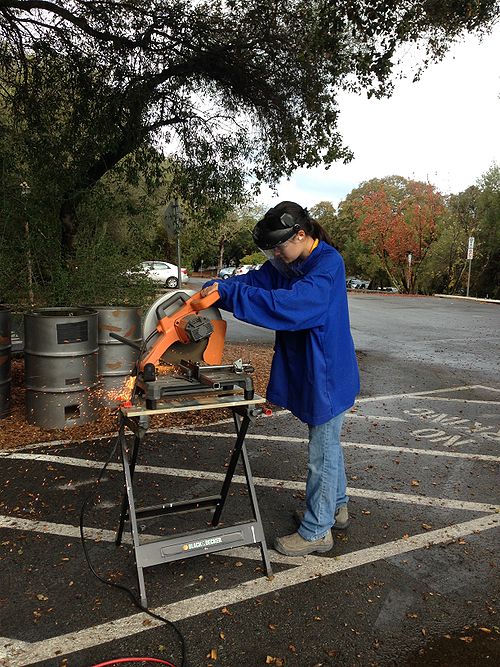
Cutting the steel
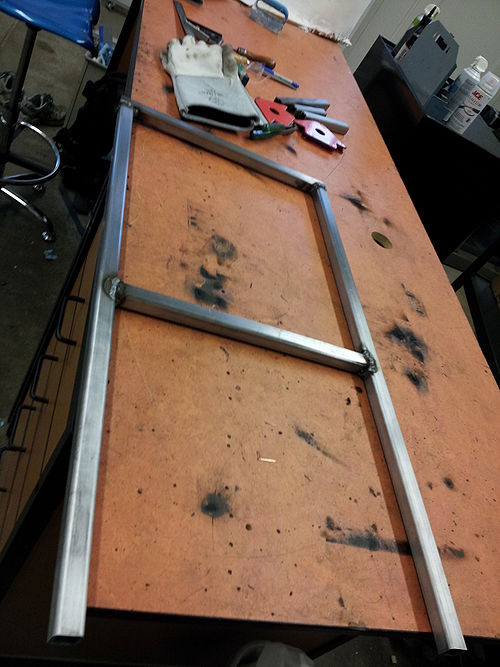
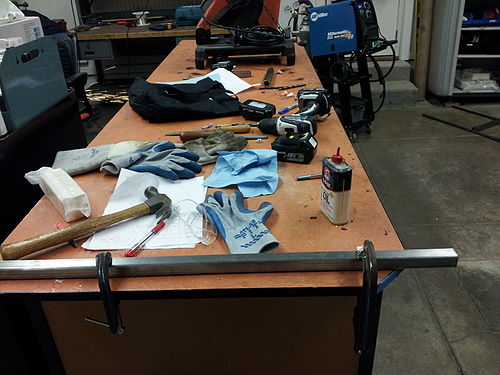
We learned how to weld for the first time and began to weld the A-frames:
A test set up for the sensors
Music experimentation
Preliminary audio accompaniment
Preliminary audio accompaniment
---
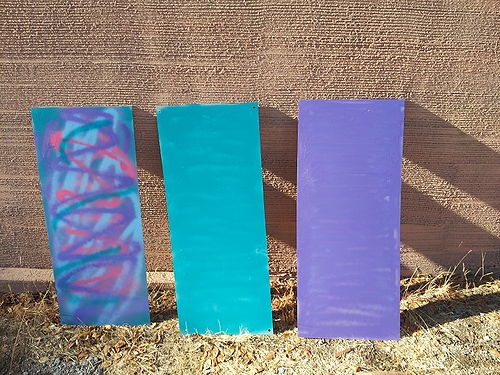
Spray-painting the mirrors
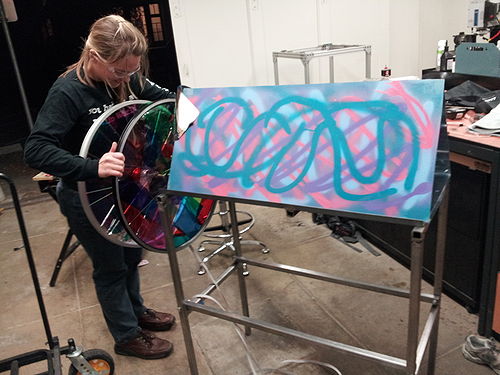
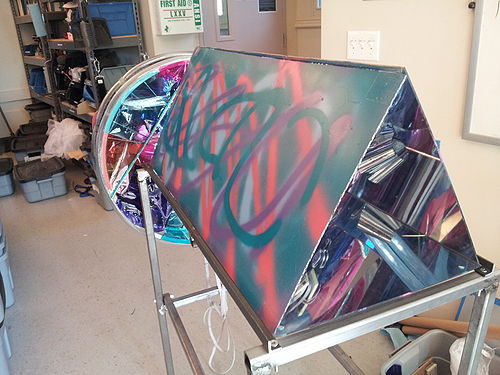
We bought teal and purple spray paint, and had a lot of fun spray painting the gray backs of the mirrors:
---
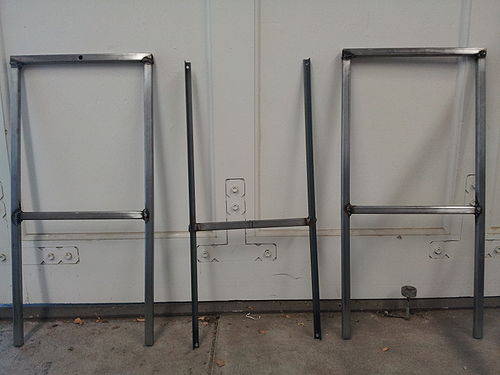
Finishing the welding
All parts of the frame have been welded! Now we just need to grind down the welds, and drill holes to bolt the pieces together.
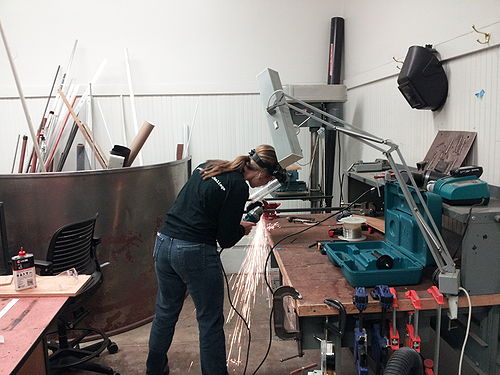
Completing the frame
Here's Brie grinding down the welds to make the frame more aesthetic:
Before grinding the weld
After grinding the weld
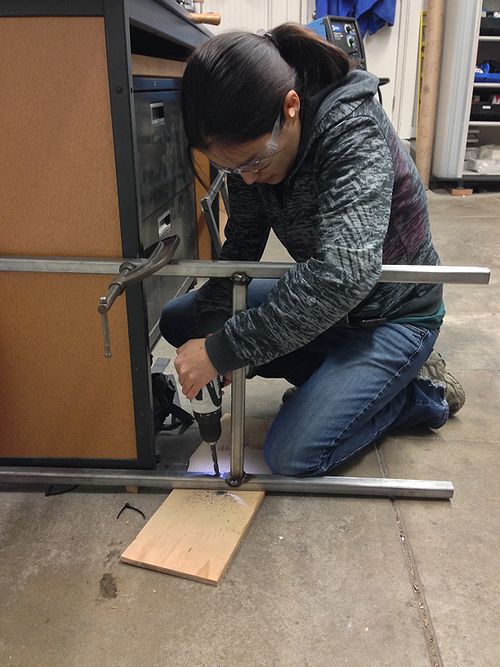
We prepare to drill the holes for the bolts:
---
'Assembling the frame
It fits! And it is very stable after tightening up the bolts.
---
The end results
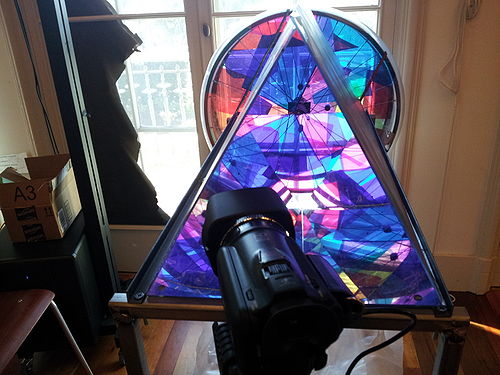
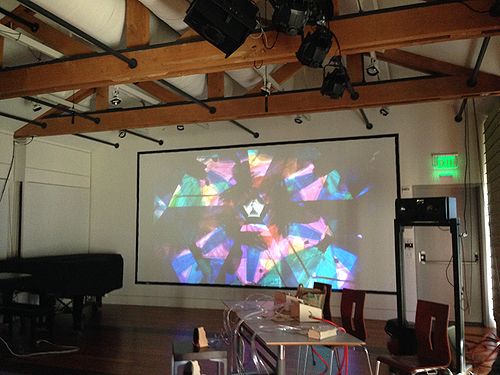
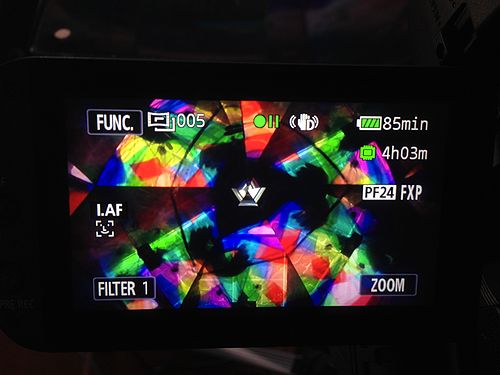
The camera points inside the kaleidoscope and projects the image for the audience.
Video camera used to project kaleidoscope
The finished instrument:
Similar Work
Papers
Discussion of the Iamascope and other musical interactions
Interactive electronic kaleidoscope: The Iamascope
Extension of the Iamascope with jazz and drums (great pictures)
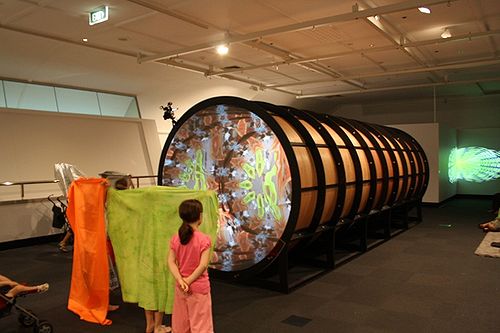
A giant digital kaleidoscope which is activated by the participation of the viewer
Takeaway: Viewers enjoy interacting with the kaleidoscope, so we should make sure that viewers can be expressive and creative in their interactions. Also, giant kaleidoscopes are awesome!
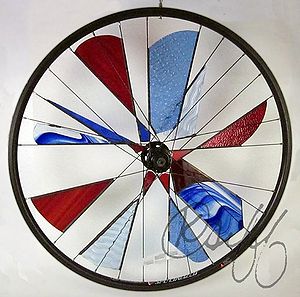
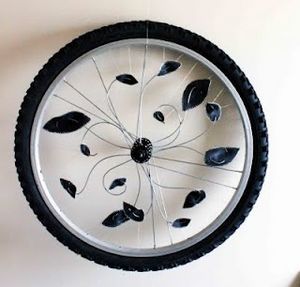
Bike Wheel Art
Takeaway: This is great inspiration for how we might want to incorporate colors into the bike wheel spokes.
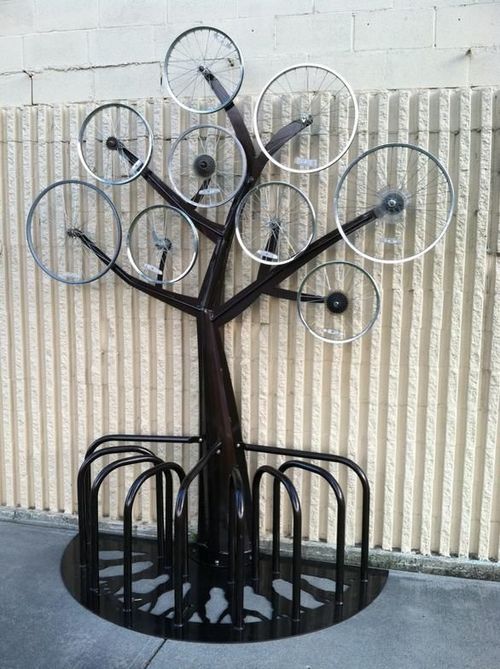
Bike rack tree
Takeaway: Love this beautiful bike rack tree. We could go with a more junkyard aesthetic, like some of the other images here. But, going with this more minimalist/clean aesthetic could perhaps have more of a wow factor, like in this case.
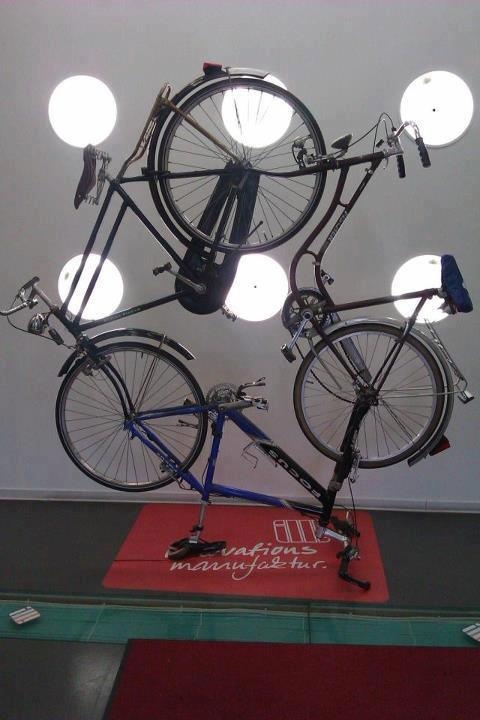
Three bikes mounted together as a tree
Takeaway: The bike frame/part aesthetic is appealing.
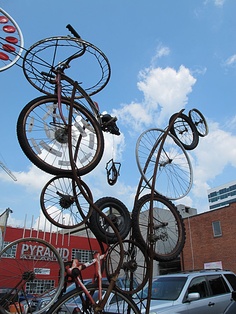
Recycled bicycle sculpture
Takeaway: Another incorporation/celebration of the junkyard aesthetic
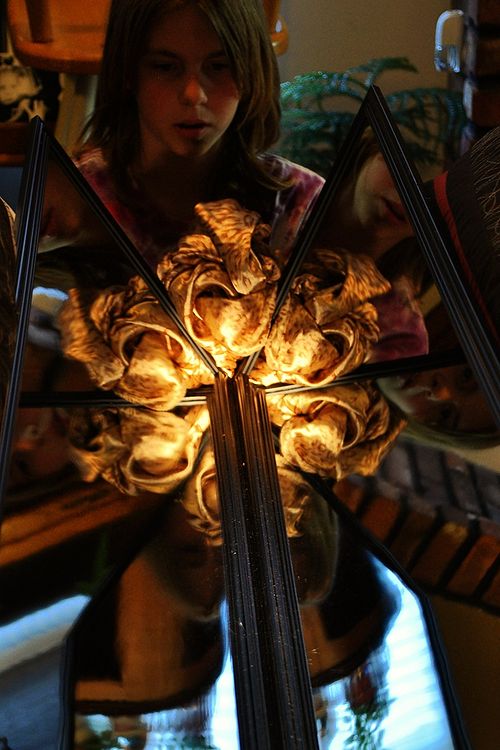
DIY homemade giant kaleidoscope
Takeaway: Light and colors make the kaleidoscope more visually engaging
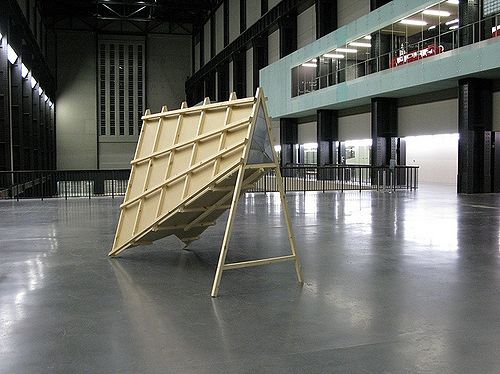
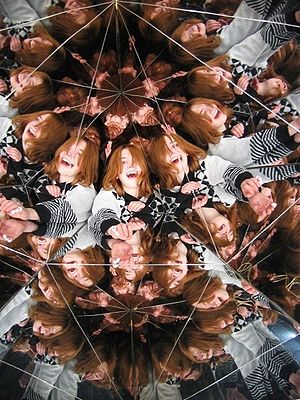
Giant kaleidoscope made for an event a Tate Modern in 2008
Takeaway: People seem to enjoy playing with the altered visual state that kaleidoscopes create
Sunrise Bike Wheel Kaleidoscope
Bicycle wheel with an axle extending out of the side that can be used as a handle while the bike wheel spins. This video shows footage from a camera mounted at the center of the wheel, mirrored four times.
Need/Want/Have
NEED: Things you need to have done for a minimal viable product
- Mount bicycle wheels so that they can stand and we can spin them.
- Modify the inside of the wheels by attaching gels, colorful beads, and perhaps altering the spokes to create interesting visual effects when spun.
- Place a triangle of mirrors such that looking through the triangle reflects the bike wheels in cool ways.
- Attach sensors (magnets and hall effect sensors) to detect bike wheel movement.
- Hook sensors up to an Arduino.
- Write code to interface with the Arduino that reads out velocity and acceleration for each bike wheel.
- Send the velocity and acceleration data to a music generation system that uses these parameters to make sound. The music should depend on the motion of the bike wheels to make the interaction, visuals, and acoustics feel connected.
- At the most basic level, the music generation system could just map the wheels to different voices (soprano, alto, tenor, and bass, assuming four wheels) and, similar to tone matrices, use a pentatonic scale to make the voices sound good together. Another simple (less smooth-sounding) option would be for the wheel velocity to control the pitch/tempo, and for different bike wheels to map to different timbres.
WANT: Things that you want to have done by the final deadline
- A camera + projector set up so that the view inside the mirrors can be seen by a larger audience
- A consistent look, sound, and feel to the instrument (grunge, elegant, artsy, etc)
- The music generation system will learn from a corpus of scores to build up a database of note sequences. Now, suppose that we spin the first wheel. We will use the velocity of the wheel to control the tempo of the music that is probabilistically generated using the database. Now, let us spin the other wheels. We use each of these to control the average note length of harmony that is probabilistically generated given the lead track.
NICE TO HAVE: Things that would be nice to have if you had unlimited time.
- A variety of sensors to allow a wider range of interaction with the kaleidoscope (perhaps detecting taps on the bike wheels, shaking of the rod, etc)
- The interaction between the wheels affects the resulting sound (ie, one wheel spinning fast while the other spins slowly is not just the combination of the individual wheels).
Elevator Pitch
We are building a giant musical kaleidoscope with bike wheels. The musician spins bike wheels with colorful gels to create awesome visual effects while sensors translate the wheel movement into music. A large kaleidoscope triangle of mirrors reflect the visuals while Hall effect sensors pick up the wheel acceleration and velocity and translate the activity into music.
List of Materials
Necessary
- 1 to 3 bike wheels
- A rod (metal) to mount the bike wheels
- Hall effect sensors (probably 1-3) to detect movement of the bike wheels
- Small magnets (+ a way to mount them to the wheels) for the Hall effect sensors
- Arduino + computer (or Raspberry Pi), speakers
- Wires, connectors for joining sensors with Arduino + computer
- 3 long mirrors for creating the triangle of mirrors
- Three 60 degree rigid angles (metal, wood, etc) plus fasteners to secure the mirrors into the triangle
- Washers and possibly nuts for holding the bike wheels in place
- Colorful gels for placing on the bike wheels (likely colorful beads etc as well)
- Frame for mounting bike wheels and mirror in the right relation to each other
Likely
- A camera and projector to take the view from the mirror tunnel and make it more broadly accessible (+projection screen)
- Sensors on other parts of the mount for other audio effects
- Spotlight to have enough light for the kaleidoscope effect
- Clip-on weights for the bike wheels for more interesting rotation
Steps for Minimal Viable Product
- Mount 1-3 bike wheels onto a rod with color gels and beads to create an interesting visual effect.
- Place a triangle of mirrors such that looking through the triangle reflects the bike wheels in cool ways.
- Mount sensors onto the instrument to sense the movement of the bike wheels (at least one bike wheel for MVP).
- Connect the sensors with an Arduino + Raspberry Pi (or computer) and translate the sensor input into basic musical output (perhaps simple pitch and modulation for MVP).
