Bassguitarpedal
Group Members: Keanu, Mike, Darrell
Goal: Create a music controller that can be effortlessly used by Electric Bass Guitar players during a performance.
The Bass Guitar Pedal:
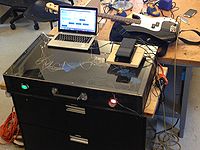
The controller, currently known as the Bass Guitar Pedal, will attempt to take advantage of the fact that electric bass guitar players do not use their feet during a performance. With that being said, Electric Bass Guitar players will be able to interact with a pad placed directly under their feet while sitting and interact with various sliders, buttons, pedals, and light sensors to manipulate their live sounds.
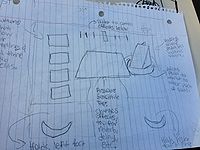
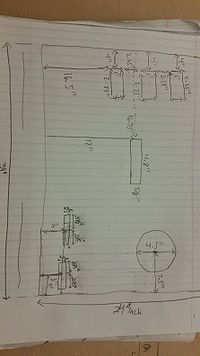
Design:
Features:
Light Sensor Slider
At the far left of the board we plan on installing 4-8 light sensors, which will be used for sampling and effects. As a user breaks each beam of light, the Arduino will cause the system to use a predetermined user effect on the sound being played or play a prerecorded loop. Whether or not the system turns on an effect or uses a sample, will depend on another button pair on the board.
Effect/Sample Buttons
At the bottom right of the board we have a Sample and effect button pair, which will be separated by a raised surface of plastic, so the user may rest their feet without having to worry about accidentally engaging the buttons while playing. If the user engages the sample button, he or she will be given a short interval which will record what is being played. While holding the sample button, the user must then choose a light beam configuration to correspond to the sample and hold the position for 2-3seconds. After this period, the user may release the sample button and now just break the same beam configuration to call on the sample. While the Effect button is pressed, the user can then just break the beams to use any of his or her predetermined effects.
Slider
In the far enter of the board, we plan on having a slider that a user can rest their foot on and slide left or right to determine the “dryness” or “wetness” of the effect.
Foot Pedal
Top right of the board, we plan on having a pedal which will modulate the signal to varying degree, which will depend on the force the user places on the pedal. To better indicate this force we plan on having an LED just above the pedal which will vary its brightness to the force applied. In addition, we plan on having the pedal being able to rotate left and right, which will control another parameter TBD.
Display
Lastly, the front middle of the pad we plan on having a LED Display that will show the user the current status of the board (lights enacted, slider position, angle of pedal, rotation of pedal, button engaged).
Analog Midi Pedals:
http://www.neufeld.newton.ks.us/electronics/?p=250
http://little-scale.blogspot.com/2010/01/how-to-use-passive-volume-control-pedal.html
http://hackaday.com/2013/12/21/an-opensource-arduino-guitar-pedal/
http://www.diyguitarist.com/DIYStompboxes/DIY-Wah.htm
Things for Minimal Viable Product:
4 Led light sensors ( receiver emitter pair)
2 buttons
1 foot pedal
1 slider
4-5 leds
2-3 arduinos
Things to add/have done by final deadline:
Rotating foot pedal
1 (low res) led screen
Multicolored LEDs
Things to add/have if we had unlimited time:
List of steps for minimal viable project:
1) Feasibility
• Introduce our ideas to Sasha; this can be through email or through this wiki.
• Meet with her to see if what we want to build is feasible for the next few weeks.
• Ask for advice on how to split and divide the project among the three members of the group.
2) Research
• Research each and every aspect about the project. This means look into similar projects, electronics, software and mechanical aspects of a bass guitar pedal.
• Electronics: There will most likely not be the exact type of project we want online. There will most likely be different projects which, all combined, will be our project. It is necessary to look into the electronics and circuitry of those different projects to get an idea of what components we need and how we will build circuits.
• Mechanics: This is really about what materials best fits our project goals. We need to first choose materials for each part of our pedal, then find places to shape and mold what we need. This is probably where most of our money will be allotted, so we need to create a budget for this part of the project. This will also go hand in hand with electronics.
• Software: Once feasibility is determined, we need to figure out how we will implement this project. We can look up examples and see what programming language was used. We can also figure out what software best simulates guitar strings.
3) Searching for Materials
• For electronics we can buy most of what is needed at radioshack. We could also look at Packard or CCRMA labs.
• For mechanics we can go to home depot. Depending on the materials, we may have to go to a more specialized store.
4) Building
• This is where we divide our project up based off of specialties.
• We are currently thinking Keanu focuses on mechanics (so he will utilize the PRL and figure out what best ways to case the project).
• Mike focuses on electronics (so he will utilize the labs at CCRMA, simulate circuits, and figure out how to best build them).
• Darrell focuses on software and uses what he learned in MUSIC 420A or Arduino software to simulate guitar strings. Darrell will also assist with circuit simulation, as that is more software related than hardware. He will also see how using an actual guitar interacts with software versus using a MIDI controller.
5) Putting Pieces All Together
• After simulating and testing and seeing that our individual parts work, we need to hook everything up together.
• This will probably be the longest stage because of debugging, so it’s necessary to allocate a great deal of time for this step.
List of Materials
Slider: We are having trouble finding a Large Slider Pot and were wondering if this is the best approach or if you know where to find a relatively large slider?
Pedal:
http://www.amazon.com/Behringer-FCV100-BEHRINGER-FOOT-CONTROLLER/dp/B0002KYXTM
Rotation for pedal:
We are debating which would be better for the rotational motion of the pedal. A Potentiometer or a rotary encoder.
Pot
http://www.adafruit.com/product/356
Rotary encoder
http://www.adafruit.com/product/377
LEDs for Pedal Feedback (2 orders):
http://www.adafruit.com/product/1768
Buttons for Effect/Sample (2 buttons):
We feel the 60mm buttons may be too large for the board. IF this is the cas we may use the low profile square 40mm buttons.
http://www.adafruit.com/search?q=button&b=1
http://www.arcadeworlduk.com/products/Rectangular-Illuminated-Arcade-Button.html
Infared Slider (TBD):
We are most likely going to stick with the lights for the sample/effect activation
Box:
Currently looking for box to buy before making anything
Schedule
This week (11/17 - 11/23) :
Goals: To get signals from accelerometer/gyroscope, volume pedal, and infrared lights
Monday (11/17):
1. Work on reading and processing accelerometer, gyroscope sensor data.
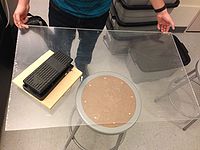
2. Measure box for acrylic for case top
3. Order acrylic for case top
4. Work on reading and processing volume pedal data
Tuesday (11/18);
Wednesday (11/19):
1. Work on reading and processing infrared sensor data
Thursday (11/20):
1. Work on reading and processing sensor data 2. Set up circuits for sensors
Friday (11/21);
1. Work on reading and processing sensor data 2. Integrate circuits between multiple sensors
Saturday (11/22):
Sunday (11/23): Goal: Have distance sensors, simple buttons working
Next week (11/24 - 11/30)
Monday (11/24): Work on reading and processing accelerometer/gyroscope data
Tuesday (11/25): N/A: Not meeting
Wednesday (11/26): N/A: Not meeting
Thursday (11/27): Thanksgiving!
Friday (11/28): Work on reading and processing accelerometer/gyroscope data
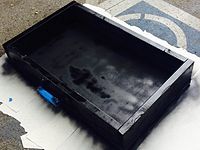
Saturday (11/29): Paint Case, Work on Max/Arduino Code,
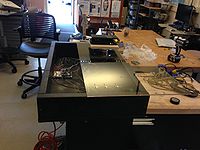
Sunday (11/30): Finish Assembly of BGP (Wiring, Arduino placement, Screwing case top onto case),
Presentation Week | 2 Weeks | (12/1 - 12/5)
Monday (12/1): Dress Rehearsal
Tuesday (12/2):
Wednesday (12/3): Project Due!!!
Thursday (12/4):
Friday (12/5):
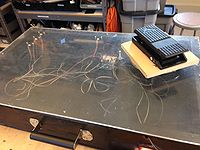
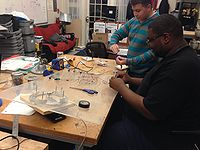
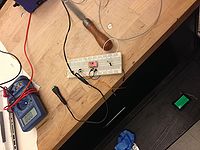
Progress Pictures:
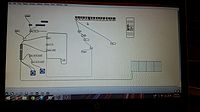
Max Programming:
Case Assembly:
Case Painting:
Wiring
