VR Lab
The VR Lab @ CCRMA conducts research in the artful design of virtual, augmented, and mixed reality (VR, AR, XR) for music. The VR Lab supports research projects in the CCRMA community, as well as collaborations with Computer Science, Art and Art History, and Communication at Stanford.
https://ccrma.stanford.edu/groups/vr/
What Plugs Into What (and Why)
Audio
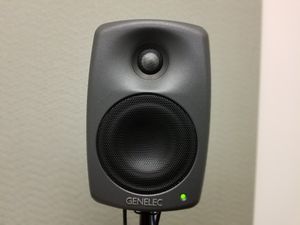
In the Reality Room, the speakers are connected to the mixer through XLR (for audio) and Ethernet (for data). Each speaker also has its own power, connected locally. The XLR outputs directly from the subwoofer to each of the speakers. The Ethernet cables are daisy chained, since each speaker has two Ethernet ports. From the subwoofer, the cables extend in two directions: one direction extending to the right of the room and looping back to the control box; the other end extending to the left of the room without returning.

The speakers are numbered from the front of the room—away from the door—to the back of the room in a left-right fashion:
- Left front
- Right front
- Left back
- Right back
- Subwoofer
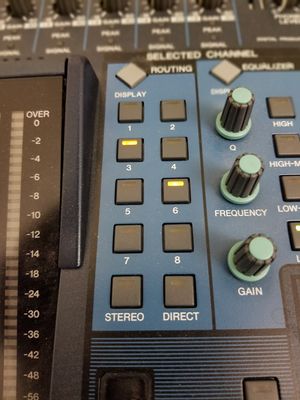
Additionally, each station is assigned a pair of two (stereo) speakers. The numbering system for this assignment is different from the numbering system of the speakers. The station numbering system goes clockwise from the front of the room:
- Demo station
- Closet station
- Laptop station
- Window station
Vive
There are two components to the Vive setup:
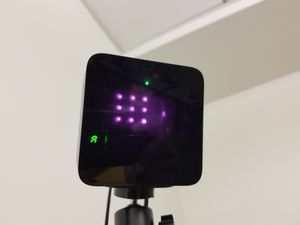
Lighthouses
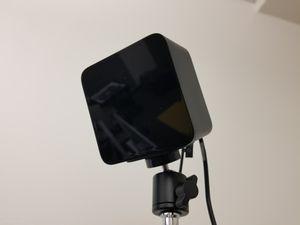
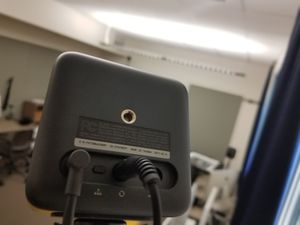
Each lighthouse has two connectors. Its leftmost port is a power connector, labeled DCIN (short for DC input), that is plugged into the wall. The third port is for a 3.5mm connector, the "sync cable," that synchronizes the Lighthouses, and should be connected to the same port on the other lighthouse. The other two ports are a button for changing the channel (the two stations should be in A-B mode if connected with the sync cable, and B-C mode if not connected with this cable), and a microUSB slot for occasional firmware updates.
Headset
The Vive headset has three connectors: one HDMI, one USB 2.0, and one DC input. These inputs come from the Link Box, which has the same 3 inputs. The DC input to the link box needs to be plugged into the wall. The HDMI input needs to be plugged into the HDMI output of your computer. The USB input needs to be plugged into the USB output of your computer. If you are running out of ports on your computer, you can use the miniDisplayPort slot on the Link Box to connect your computer to the link box. Both video cables should not be connected at the same time.
If you are using an external GPU (eGPU), the HDMI cable should run from the Link Box into your eGPU, and the USB cable should run from the link box directly to your computer. (The eGPU enclosures we own as of April 2019 do not function as USB hubs.)
The HDMI cable is for passing frames from your GPU to the headset to be displayed. The USB connection allows two-way communication between the headset and SteamVR. The link box has a radio allowing it to listen to the base stations, giving it tracking info to pass along.
Oculus
Cameras
Each camera has a single connector: a USB 2.0 that should be connected to computer USB 2.0 ports (USB 3.0 Type A will also work, but Oculus suggests only connecting one of the cameras with it).
Headset
The Rift headset has two connectors: one HDMI, one USB 3.0 Type A. Both should be plugged into your computer.
Note that you will thus need 2-3 USB ports free on your computer to use the Oculus Rift.
Acer
What Hardware Runs What Software
How to Get Set Up
The easiest way to get set up for XR development is to start with a VR Lightweight Render Pipeline(VR LWRP) project in Unity. 2019.1 or later is preferable, but it is available in 2018.3 as well. This project will work out of the box* with the Vive and other rigs. (One tiny caveat: if you've set up room-scale VR, then you'll need to set the ... field on the Set Correct Camera Height script attached to the XR Rig GameObject to Room Scale rather than Stationary. Otherwise the view won't actually be at your eye level.)
Where to Go For Help
Unity
Roll-a-ball is a quick and easy tutorial on the most basic parts of Unity like creating game objects, prefabs, scripting, etc.
The Unity engine manual provides official documentation of most of what Unity can do. It gives information on both what's accessible through the UI and what's accessible through C# scripting.
Unity's forums are also a resource for answering "how do I do X" questions, although you may need to double-check advice there because Unity's APIs may have changed since the time an answer was posted.
ChucK & Chunity
Most--but not all--of the ChucK language is documented on its home page, either under language specification or unit generators.
If ChucK is giving you difficulties that aren't answered in the language reference, try searching the ChucK user mailing list with [your issue] site:lists.cs.princeton.edu/pipermail/chuck-users/
Jack has a website with documentation and tutorials for Chunity, his plugin that allows ChucK code to be invoked within Unity in real time. The tutorials take off where the Roll-a-ball tutorial ends, and walk you through integrating Chunity, communicating between Unity and ChucK, spatialization, and dealing with external audio files.
VR
Ray Wenderlich's tutorial is solid starting point for working with the Vive headsets in Unity. As of April 2019, it has been updated to cover the new, action-based, hardware-agnostic methods, rather than the old, purely-code-based method of addressing the controllers. Note however that this tutorial will tell you to delete actions like the Pose action, which is necessary for animating the controllers. It may be worth looking into the official documentation instead.
At the moment, the VR Lab hasn't made much use of other headsets . . . so have fun exploring those uncharted waters! And feel free to add relevant resources as you come across them.