CCRMA Documentation links: index contents overview rooms account staff about
(contents of this file: links to each section)
The CCRMA Listening Room (Knoll 128) is a lab customized for listening to spatial sound.
All audio streams in the room are routed and controlled through a custom program called OpenMixer running on a dedicated computer. OpenMixer provides for multiple multichannel inputs to be routed simultaneously to any or all speakers in the room. OpenMixer can also decode Ambisonics multichannel streams from any of its inputs to the speaker arrangement of the room.
Please don’t move the speakers or change their settings as the room has been calibrated for the current speaker positions and settings. Please don’t rewire anything (signal or power cables), there is no need to do that.
In this space you should see:
Do not turn off, unplug, or rewire any machines or speakers. Do not move speakers from their current locations or change their settings.
Press the reset button on the right OpenMixer controller so all speakers and input levels are set to zero.
Turn off the lights and especially the do not disturb light on your way out.

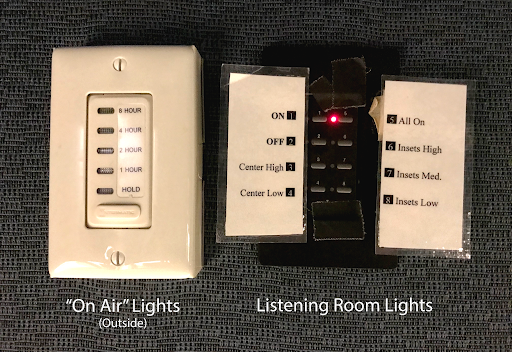
The controls for the lights are on your left when you walk in, right next to the do not disturb light controls.
Press and hold the buttons on the lighting panel, as these are stage lights that use gradual transitions and will not change immediately. There are eight options:
There are also desk lamps at the mixers and Linux workstation, and a standing lamp.
Diagram taken from https://ccrma.stanford.edu/softwareopenmixer/manual/normal_mode
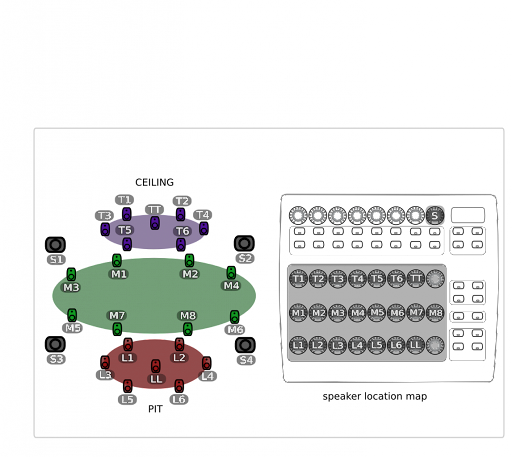
The channel numbering:
Note:
| num | azi | elev | distance |
|---|---|---|---|
| 22.5 | 0 | 3.12 | |
| 67.5 | 0 | 3.12 | |
| 112.5 | 0 | 3.12 | |
| 157.5 | 0 | 3.12 | |
| -157.5 | 0 | 3.12 | |
| -112.5 | 0 | 3.12 | |
| -67.5 | 0 | 3.12 | |
| -22.5 | 0 | 3.12 | |
| 30.0 | 40.0 | 2.12 | |
| 90.0 | 40.0 | 2.23 | |
| 150.0 | 40.0 | 2.11 | |
| -150.0 | 40.0 | 2.11 | |
| -90.0 | 40.0 | 2.23 | |
| -30.0 | 40.0 | 2.12 | |
| 30.0 | -50.0 | 2.33 | |
| 90.0 | -50.0 | 2.28 | |
| 150.0 | -50.0 | 2.22 | |
| -150.0 | -50.0 | 2.22 | |
| -90.0 | -50.0 | 2.28 | |
| -30.0 | -50.0 | 2.33 | |
| 0 | 90.0 | 1.44 | |
| 0 | -90.0 | 1.9 |
The listening room is equipped with a number of devices which control audio and video playback.
[TODO add photos]
There is a projector mounted from the ceiling which can be powered on/off with its remote from the remote cabinet.
The video input to the projector is controlled via the Outlaw processor.
The Outlaw is located to the right of the Linux machine, and just below the display tablet. This processor routes audio and video the following inputs:
Press the “Input” button to cycle through these input methods.
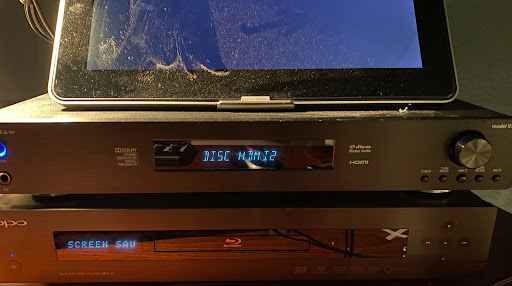
Video coming from the Outlaw’s can be routed to the projector
Audio coming from the Outlaw’s is wired to an OpenMixer input that you can select
Located to the right of the Linux machine, you’ll find four encased MOTUs (listed from top to bottom):
The box opens with a key that should already be inserted. These are the audio interfaces through which you can route your own audio to the room speakers.
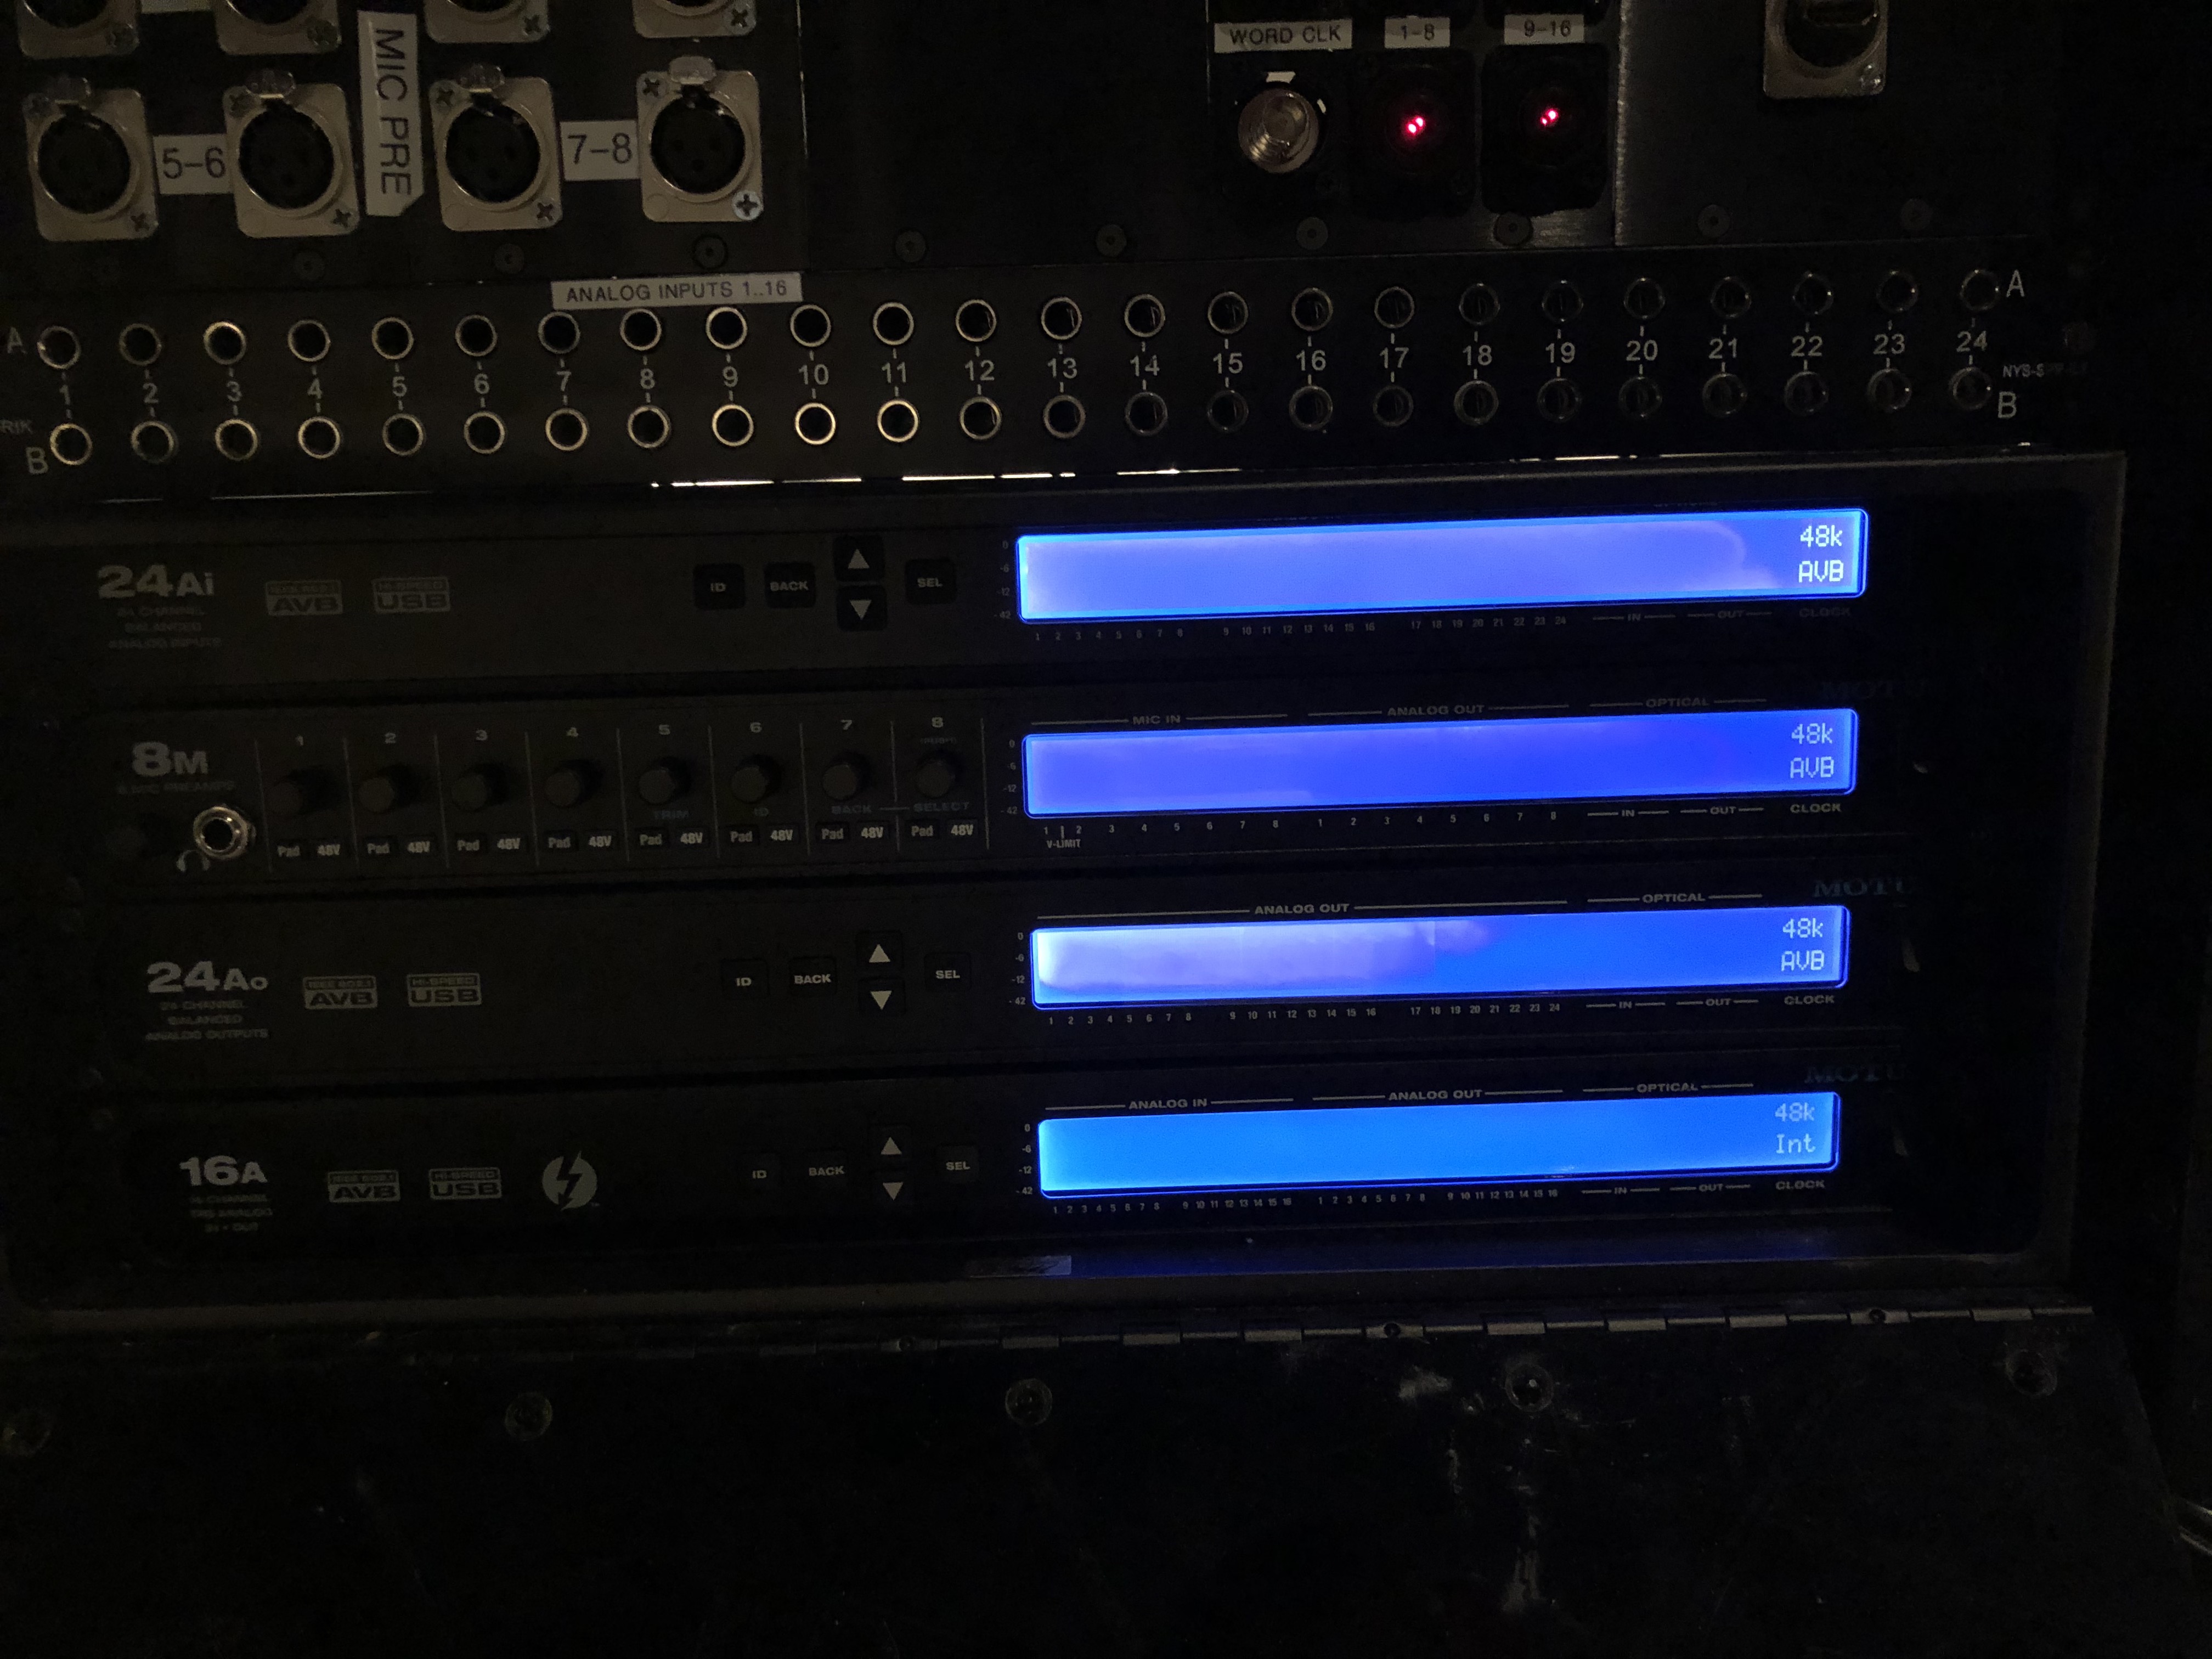
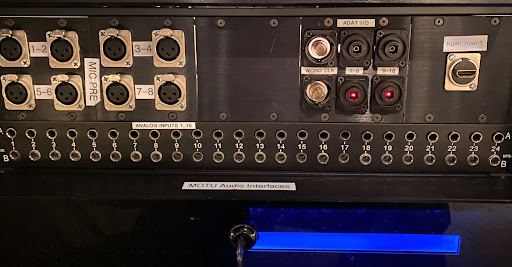
Immediately above the MOTU box is a patch bay which connects audio inputs to the appropriate MOTU.
The OPPO is a blue-ray/DVD/CD player. The play audio and video from the OPPO, select input HDMI 2 on the Outlaw.
These control how sound is processed and routed to the listening room speakers. See https://ccrma.stanford.edu/software/openmixer/manual for more details.
(this paper - presented in the Linux Audio Conference 2010 - explains the motivations and subsequent development of the OpenMixer hardware and software)
![[Openmixer]](Listening-Room-openmixer.png)
Input selection:
Desktop :The CCRMA Linux Machine cmn36.
Laptop A :Plugged into the MOTU 8M
Laptop B :Plugged into the MOTU 24Ai
Analog :16 analog inputs on the patch bay (¼” balanced TRS)
Presets:
-15dB :The “preset” for -15 dB - sets all gains
-5dB :The “preset” for -5 dB - sets all gains
0dB :The “preset” for 0 dB - sets all gains
SPKR TEST :Plays a noise burst out each loudspeaker, then each subwoofer, in turn. Useful for troubleshooting.
There are 2 USB cables hooked on the right side of the desk that holds all the MOTU interfaces [TODO add photo]:
LR_OM_8M. The MOTU 8M has 8 microphone
inputs (hence the name “8M”).24Ai, and has 24 analog inputs (hence the name
“24 Ai”).Plug the appropriate USB into your laptop, go to sound preferences,
and select the MOTU (LR_OM_8M or 24Ai).
Go to the OpenMixer controller and make sure to select the corresponding input source to your MOTU choice: ‘Laptop A’ for 8M and ‘Laptop B’ for 24Ai.
Push to select one of the gain presets, to adjust the gain (0 dB, -5 dB, and -15 dB presets). Individual channels can be adjusted by moving the faders corresponding to the channel of interest. Keep in mind that playing audio from a web browser will output in stereo, and not to the full speaker array. Monitor the display screen overhead, and MOTU, to see that your input is successfully being routed to output channels.
If what you want to do involves sound coming into your laptop (e.g., from microphones or other live sound sources) then you will care about the difference between the 8M’s eight channels of mic preamps versus the 24Ai’s 24 channels of line-level inputs.
Note: the sampling rate of the MOTU should automatically match that of your computer. If not, the sampling rate can be manually adjusted on the Openmixer controller. Push the button of the appropriate sampling rate (441.k or 48k), and wait ~30s for the system to update. You may see and hear the mixer reset to 0dB preset, when complete. See below in “Open Mixer Operation” for more information [TODO link].
In the labeled drawer of the rightmost desk that contains the MOTUs, Outlaw, etc. you should find a remote to the overhead projector. You should also be able to locate a labeled male mini-HDMI cable and female HDMI port.
You can plug your laptop via HDMI (or mini-HDMI) into either labeled cable or port:
Use the projector remote to turn on the projector.
For laptop video, press the “Input” button on the Outlaw to select either TV HDMI 1 or Game HDMI 3, corresponding to the labeled cable used to connect your laptop (“HDMI 1“, “HDMI 3” respectively).
To the right of the linux machine, and sitting on the table top surface below the tablet display, you will find the NanoKontrol.
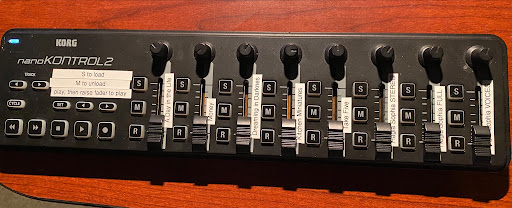
The NanoKontrol is labeled with instructions to play demo pieces in the listening room.
Press “S” by the track of interest, to load that track. Press “M” to unload that track. Press the play button and raise the fader to hear a loaded track.
If your computer doesn’t recognize the MOTU when you plug in its USB, try power cycling the MOTU
If the display tablet on top of the Outlaw shows a crash dump or isn’t properly showing gain levels for the various speaker channels, try power cycling the Linux machine. TODO: Add photo of hard-to-find power button
If you’re connected to an audio input but there’s still no sound, go to the Openmixer controller and:
Prior to this page, the main documentation was at https://ccrma.stanford.edu/room-guides/listening-room
This page of CCRMA documentation last committed on Sat Jul 20 11:38:34 2024 -0700 by Matthew James Wright. Stanford has a page for Digital Accessibility.